Author: shrwanswami@gmail.com

  • Roof Ventilation Guide: Why It Matters for Your Home

    Roof Ventilation Guide: Why It Matters for Your Home

    Ever gone up to your attic or top-floor storage room in the middle of summer and felt like you’d walked into an oven? That heat isn’t just uncomfortable — it’s a sign your roof isn’t breathing the way it should. This roof ventilation guide is going to walk you through why that matters more than most homeowners realize, and what you can actually do about it.

    Most people think about roofs in terms of leaks and shingles. Airflow rarely crosses their mind until an electrician or a contractor points out mold on the rafters, or a suspiciously high summer electricity bill. Good ventilation isn’t glamorous, but it quietly protects everything under your roof — the structure, the insulation, and honestly, your wallet too.

    What Is Roof Ventilation, Really?

    Quick answer: Roof ventilation is the system that lets hot, moist air escape from your attic or under-roof space while pulling in cooler, drier air from outside — usually through a combination of intake vents at the eaves and exhaust vents near the ridge.

    Think of it like your house needs to exhale. Hot air rises and gets trapped just under the roof deck. Without a way out, that heat sits there, baking your insulation, warping wood over time, and pushing indoor temperatures up in every room below.

    There are two halves to any functioning system: intake and exhaust. Intake vents, usually placed along the soffit or eaves, let cooler outside air in. Exhaust vents — ridge vents, gable vents, or powered attic fans — let the hot air escape from the top. One without the other barely works. I’ve seen plenty of homes with a fancy ridge vent installed but zero intake, and it does almost nothing on its own.

    Why Roof Ventilation Affects Your Energy Bills

    A poorly ventilated attic can push your top-floor cooling costs up significantly, sometimes by 10-15%, because your AC is fighting against superheated air sitting just above the ceiling instead of a properly vented space.

    This one surprises people. Your air conditioner isn’t just cooling the room you’re sitting in — it’s fighting whatever heat is radiating down from above. If your attic hits 60°C in peak summer (which isn’t unusual in cities like Jaipur or Nagpur), that heat doesn’t just stay up there. It pushes through the ceiling and insulation into your living space.

    Picture a small business owner running a retail shop in Jaipur with a flat concrete roof and no real ventilation gap. Their AC runs almost constantly from April through June, and even then, the upper floor never quite feels cool. Adding a simple ventilation gap or turbo vent system in cases like this can noticeably cut that AC runtime — I’ve heard contractors quote anywhere from 8% to 20% depending on the setup.

    Roof Ventilation and Moisture Control

    Heat gets all the attention, but moisture is arguably the bigger long-term threat. Warm, humid air rising from your living space condenses when it hits a cooler roof deck, especially during monsoon season or cold winter nights.

    That condensation doesn’t just disappear. It sits on wood beams, insulation, and metal fasteners, creating the exact conditions mold and rot need to thrive. A properly vented roof ventilation system keeps that air moving so moisture doesn’t have a chance to settle and linger.

    Some warning signs your ventilation isn’t handling moisture well:

    • Musty smell in the attic or top floor, even when it’s not raining
    • Dark staining or mold spots on the underside of the roof deck
    • Rusting nails or metal brackets inside the attic space
    • Insulation that feels damp or matted down

    If you’re spotting any of these, it’s worth getting the ventilation checked before it becomes a structural repair bill instead of a $50 fix.

    Types of Roof Ventilation Systems

    Not every home needs the same setup, and honestly, a lot of it comes down to your roof design and local climate. Here’s a rundown of the common options:

    1. Ridge vents — run along the peak of a sloped roof, letting hot air escape continuously; low-maintenance and unobtrusive
    2. Soffit vents — installed under the eaves, these handle the intake side of the equation
    3. Gable vents — placed on the triangular wall sections at each end of the attic, good for cross-ventilation
    4. Turbine (whirlybird) vents — those spinning metal vents you see on Indian rooftops, powered by wind, surprisingly effective and cheap to install
    5. Powered attic fans — electric fans that actively pull hot air out, useful in low-wind areas but they do add to your electricity usage
    6. Static vents — simple fixed openings, no moving parts, works passively with natural airflow

    For most Indian homes with pitched roofs, a combination of soffit vents plus either a ridge vent or turbine vents tends to hit the sweet spot between cost and performance. Flat-roof buildings need a different approach entirely, usually involving a ventilated air gap or insulated panels.

    How Much Roof Ventilation Do You Actually Need?

    The general rule of thumb in the industry is 1 square foot of vent area for every 300 square feet of attic floor space, split roughly 50-50 between intake and exhaust.

    That’s the standard formula, though it’s not gospel — homes in hotter, more humid regions sometimes benefit from a bit more. A contractor who actually inspects your roof structure will give you a more accurate number than any generic rule, so treat that ratio as a starting point, not a final answer.

    Too little ventilation and you’re back to the heat-and-moisture problems we just covered. Too much, in rare cases, can actually let in wind-driven rain during monsoon storms, so balance matters more than sheer volume.

    Signs Your Home Needs Better Roof Ventilation

    Some of these are obvious once you know to look for them, others less so. Ice buildup isn’t really an Indian-climate concern, but plenty of the others are.

    • Top floor rooms feel noticeably hotter than the rest of the house
    • Attic temperature is dramatically higher than outdoor temperature on a sunny day
    • Peeling paint or warped wood on the ceiling
    • Higher-than-expected cooling bills during summer months
    • Visible mold, mildew, or a persistent musty odor

    Honestly, if even two or three of these sound familiar, it’s worth having someone take a look. [link to related guide on roof inspection checklist here]

    Common Roof Ventilation Mistakes Homeowners Make

    I’ll be blunt here — the most common mistake I see is installing exhaust vents without matching intake. It looks like ventilation, but it barely functions, because the exhaust vent has nothing to pull from.

    A few others worth flagging:

    • Blocking soffit vents with insulation stuffed in too far
    • Painting over vent louvers, which restricts airflow without anyone noticing
    • Mixing vent types incorrectly (like combining a ridge vent with a powered fan, which can actually pull air backward through the ridge)
    • Skipping ventilation entirely on flat-roof extensions or additions

    None of these are dramatic failures on day one. They’re slow, quiet problems that show up as a mold patch two years later or a roof that needs re-decking a decade early.

    FAQ: Common Questions About Roof Ventilation

    Does every home need roof ventilation? Pretty much, yes. Even flat-roof and concrete-slab homes benefit from some form of airflow management, though the system looks different than a typical soffit-and-ridge setup on a sloped roof.

    Can too much roof ventilation be a problem? In rare cases, yes — excessive or poorly placed vents can let in wind-driven rain or dust, so it’s about balance rather than maximizing vent area.

    How do I know if my attic is properly ventilated? A simple test is checking your attic temperature on a hot day; if it’s more than about 10-15°C above outdoor temperature, ventilation is likely inadequate.

    Do turbine vents actually work, or are they just for show? They genuinely work, especially in areas with reasonable wind, and they’re one of the more affordable exhaust options available in India.

    Will better roof ventilation lower my electricity bill? Often, yes, particularly for top-floor rooms directly under the roof — reduced attic heat means your AC doesn’t have to work as hard.

    Can I add roof ventilation to an older home without major renovation? In most cases yes, retrofitting soffit or turbine vents is a fairly straightforward job that doesn’t require tearing into the whole roof structure.

    Final Thoughts

    Roof ventilation doesn’t get the attention shingles or waterproofing gets, but it quietly affects your comfort, your energy bills, and how long your roof structure actually lasts. Skip it, and you’re looking at higher cooling costs now and possible mold or rot damage down the line.

    The good news is that fixing poor ventilation is usually one of the more affordable roofing upgrades out there, especially compared to a full re-roof. If your top floor runs hot every summer or you’ve noticed a musty smell up there, that’s worth a proper inspection before the 2026 summer heat sets in. [link to related guide on choosing a roofing contractor here]


  • Best Real Estate Investment Strategies for Beginners

    Best Real Estate Investment Strategies for Beginners

    Got some savings sitting in a fixed deposit earning barely 6-7%, and you’re wondering if property could do better? You’re not alone. A lot of people ask me this exact question, and honestly, the right real estate investment strategies for beginners depend less on how much money you have and more on how much risk you can stomach.

    Real estate feels intimidating at first — big numbers, legal paperwork, brokers who talk fast. But it doesn’t have to be. Once you understand the basic paths available, picking one becomes a lot less scary. This guide breaks down what actually works when you’re starting from zero.

    Why Real Estate Still Makes Sense for New Investors

    Property has this old-school appeal — you can see it, touch it, rent it out. Unlike stocks, it doesn’t crash 5% before your morning coffee’s even cold.

    In short: Real estate offers beginners a tangible asset that typically appreciates over time, generates passive rental income, and provides tax benefits under Indian law — making it a solid diversification tool alongside equities and mutual funds.

    That said, I’ll be honest — it’s not for everyone. If you need liquidity in the next year or two, real estate isn’t your friend. Selling a flat takes months, sometimes longer.

    Strategy 1: Buy and Hold Rental Properties

    This is the classic starting point for most real estate investment strategies for beginners, and for good reason. You buy a property, rent it out, and let both the rental income and long-term appreciation work for you.

    Picture a young IT professional in Pune who buys a 2BHK for ₹55 lakh with a 20% down payment. She rents it for ₹18,000 a month, covers most of her EMI, and over 8-10 years, the property’s value climbs alongside the neighborhood’s development. That’s buy-and-hold in a nutshell.

    A few things to keep in mind:

    • Location matters more than the property itself — proximity to IT hubs, metro lines, or upcoming infrastructure projects drives appreciation
    • Rental yields in India typically run 2-4% annually, which sounds low, but the real return comes from capital appreciation
    • Factor in maintenance, property tax, and vacancy periods before calculating your actual returns

    Strategy 2: REITs — Real Estate Without Buying Property

    If ₹50 lakh sounds like a stretch, Real Estate Investment Trusts (REITs) let you invest in commercial property with as little as ₹10,000-15,000 through the stock exchange.

    I actually think this is the most underrated of all real estate investment strategies for beginners in India right now. REITs like Embassy Office Parks or Mindspace trade just like stocks, pay quarterly dividends, and you don’t have to deal with tenants calling about a leaking tap at 11 PM.

    The tradeoff? You don’t get the same appreciation potential as owning physical property directly, and returns are more modest — typically 6-8% including dividends.

    Strategy 3: Fix and Flip Properties

    This one’s riskier, and frankly, I wouldn’t recommend it as your very first real estate move. Fix-and-flip means buying an undervalued or older property, renovating it, and selling for a profit within a short window — usually 6-18 months.

    Quick answer: Fix-and-flip investing involves purchasing undervalued properties, renovating them, and reselling at a profit quickly. It requires strong market knowledge, renovation budgeting skills, and capital reserves — making it riskier and less beginner-friendly than buy-and-hold strategies.

    Has this ever tempted you after watching one too many renovation shows? It’s trickier in real life. Renovation costs in India often overshoot budgets by 20-30%, and finding buyers quickly isn’t guaranteed, especially in slower markets.

    Strategy 4: Real Estate Crowdfunding Platforms

    Platforms like PropertyShare and Assetmonk let smaller investors pool money into commercial or residential projects, often starting at ₹25,000-₹1 lakh.

    [link to related guide on best real estate crowdfunding platforms in India here]

    This is a newer space, so due diligence matters a lot here. Check the platform’s track record, the developer’s reputation, and read the fine print on exit timelines before committing.

    Strategy 5: Land Banking

    Buying agricultural or undeveloped land on the outskirts of expanding cities, then holding it until urbanization catches up, is a long game. Some of the wealthiest property investors I’ve come across built their portfolios this way, buying land near Bangalore or Hyderabad decades before it became prime real estate.

    The catch — this needs patience measured in decades, not years, and land comes with its own legal headaches around titles and conversion.

    How Much Capital Do You Actually Need to Start?

    You don’t need lakhs sitting idle to begin. REITs let you start with ₹10,000. Buy-and-hold typically needs 20% down payment plus registration costs, roughly 7-10% of property value in most Indian states.

    [link to related guide on home loan pre-approval process here]

    Mistakes Beginners Should Avoid

    • Buying purely because “prices always go up” — they don’t, always
    • Skipping legal due diligence on title deeds and approvals
    • Over-leveraging with EMIs that eat more than 40% of monthly income
    • Ignoring rental demand in the area before buying for rental income

    FAQ: Real Estate Investing Questions Beginners Ask

    What’s the safest real estate investment strategy for beginners? Buy-and-hold rental property or REITs are generally considered safer starting points since they’re less speculative than flipping or land banking.

    How much money do I need to start investing in real estate? You can start with REITs for as little as ₹10,000-15,000, or plan for at least 20-25% of property value if buying physical real estate.

    Is real estate a good investment in 2026? It remains solid for long-term wealth building, though returns vary heavily by city and property type — always research local market trends first.

    Can I invest in real estate with a home loan? Yes, most buy-and-hold investors use home loans, letting rental income partially offset EMI payments while building equity.

    Are REITs better than buying physical property? Not necessarily better, just different — REITs offer liquidity and lower entry costs, while physical property offers more control and higher appreciation potential.

    How long should a beginner hold a real estate investment? Most experts suggest at least 5-7 years to ride out market cycles and see meaningful appreciation.

    Wrapping It Up

    There’s no single “best” approach here — the right one depends on your capital, risk appetite, and how hands-on you want to be. Beginners often do well starting with either a REIT or a modest rental property, then expanding once they’ve got a feel for how the market moves.

    Don’t rush into your first deal just because a broker’s pushing you. Take a few months, study your city’s micro-markets, and start small. Real estate rewards patience far more than it rewards speed.

    So, how long does a roof last? Somewhere between 15 and 100 years, depending entirely on what it’s made of and how well it’s cared for. Asphalt gives you an affordable middle ground, metal and tile go the distance, and slate is basically generational.

    The real takeaway, though, is that material only sets the potential — maintenance decides whether you actually get there. If your roof is past the 15-year mark and you haven’t had it looked at recently, that’s probably worth fixing before your next monsoon season rolls around, not after the ceiling starts staining.

  • How to Get Pre-Approved for a Home Loan: Step-by-Step Guide

    How to Get Pre-Approved for a Home Loan: Step-by-Step Guide

    So you’ve finally decided to buy a house. Good for you. But before you start swiping through property listings on weekends, there’s one thing you really should sort out first: knowing exactly how much loan you can actually get. That’s where learning how to get pre approved for a home loan comes in, and honestly, it changes the entire way you shop for a house.

    A pre-approval isn’t just a formality bankers ask you to complete. It’s a written commitment from a lender saying “yes, based on your income and credit history, we’re willing to lend you this much.” I’ve seen too many buyers fall in love with a flat, only to find out later they qualify for 30% less. That heartbreak is avoidable.

    What Does Home Loan Pre-Approval Actually Mean?

    Pre-approval is a lender’s conditional promise to finance your home purchase up to a certain amount, based on your financial profile — before you’ve even picked a property.

    It’s different from “pre-qualification,” which is basically a rough estimate with zero paperwork checked. Pre-approval, on the other hand, involves the bank actually verifying your income, credit score, and existing debts. Banks like SBI, HDFC, and ICICI usually issue this as a formal letter valid for 3 to 6 months.

    Think of it as a shopping budget with the bank’s stamp on it. You walk into negotiations knowing your limit, and sellers take you more seriously too — especially in competitive markets like Gurgaon or Bangalore where multiple buyers might be eyeing the same flat.

    Why Getting Pre-Approved for a Home Loan Matters

    Getting pre approved for a home loan before house-hunting saves you time, embarrassment, and sometimes real money. Sellers and brokers prioritize buyers who’ve already got their financing sorted — it signals you’re serious, not just browsing.

    There’s also a practical side nobody talks about enough: interest rate protection. Some lenders lock your rate for the pre-approval window, shielding you if rates climb while you’re still hunting. Given how RBI’s repo rate decisions have swung over the past couple of years, that’s not a small thing.

    Step 1: Check Your Credit Score First

    Before you even think about applying, pull up your CIBIL score. Most lenders in India want to see 750 or above for the best rates — anything below 650 and you’ll either get rejected or slapped with a higher interest rate.

    If your score’s low, don’t rush the application. Spend 2-3 months clearing outstanding credit card dues and avoid taking new loans in that window. It genuinely moves the needle.

    Step 2: Get Your Documents Ready

    This is the part everyone dreads, but it’s really not complicated once you know the list. Lenders typically ask for:

    • PAN card and Aadhaar (identity and address proof)
    • Last 3 months’ salary slips, or ITR for the last 2-3 years if you’re self-employed
    • Bank statements for the last 6 months
    • Form 16 or income tax returns
    • Photographs and a filled application form

    A quick, honest tip: self-employed applicants usually face more scrutiny. If that’s you, keep your business’s financial statements audited and updated — it saves weeks of back-and-forth later.

    Step 3: Compare Lenders Before Applying

    Don’t just walk into whichever bank you already have a savings account with. Rates, processing fees, and pre-approval validity periods vary quite a bit between lenders.

    A crisp answer: To compare home loan lenders effectively, check the interest rate (fixed vs floating), processing fee (usually 0.5%-1% of loan amount), prepayment charges, and how long the pre-approval stays valid — typically 3 to 6 months.

    [link to related guide on comparing home loan interest rates here]

    Step 4: Submit Your Application

    Once you’ve picked a lender, fill out the application form online or at a branch. Most major banks now let you do this entirely through their app, which honestly makes the whole home loan pre-approval process a lot less painful than it used to be even five years back.

    Upload your documents, and the lender’s underwriting team gets to work verifying everything — your income, your employer, your existing debts, the works.

    Step 5: Wait for Verification and Credit Check

    This is where the lender runs a hard credit inquiry and cross-checks your documents. It usually takes anywhere from 3 to 7 working days, though some digital-first lenders promise 24-48 hours.

    Picture a young software engineer in Pune applying with HDFC — if his documents are in order and his CIBIL score is healthy, he could have his pre-approval letter in under a week. Compare that to a self-employed shop owner in Jaipur whose income needs more verification; that process might stretch to two weeks.

    Step 6: Receive Your Pre-Approval Letter

    If everything checks out, you’ll get a formal letter stating your approved loan amount, applicable interest rate, and validity period. Keep this handy — you’ll need to show it to sellers and sometimes even attach it while making an offer.

    Common Mistakes to Avoid During Home Loan Pre-Approval

    Getting pre approved for a home loan sounds simple, but small missteps derail plenty of applications. A few I’ve personally seen trip people up:

    • Applying to too many lenders at once (multiple hard inquiries hurt your credit score)
    • Making big purchases or taking new loans right after pre-approval, which can invalidate it
    • Switching jobs mid-process — lenders get nervous about income stability
    • Not accounting for the pre-approval’s expiry date and house-hunting way past it

    FAQ: Home Loan Pre-Approval Questions People Actually Ask

    Is home loan pre-approval free? Mostly yes, though some banks charge a nominal processing fee upfront that gets adjusted later against your final loan processing charges. Always ask before applying.

    How long does home loan pre-approval last? Typically 3 to 6 months, depending on the lender. After that, you’ll need to reapply or get it renewed with updated documents.

    Does pre-approval guarantee my loan will be approved? Not entirely. Final approval also depends on the property’s legal and technical valuation, which happens after you’ve selected a house.

    Can I get pre-approved by multiple banks? You can, but it’s not always wise — too many hard inquiries in a short span can actually dent your credit score.

    What credit score do I need for pre-approval? Most lenders prefer 750+, though some approve applicants with scores as low as 650, usually at a higher interest rate.

    Does pre-approval affect my credit score? Yes, slightly. It usually involves a hard inquiry, which can dip your score by a few points temporarily.

    Wrapping It Up

    Getting pre-approved isn’t glamorous, but it’s the single smartest move you can make before house-hunting in 2026. It tells you your real budget, speeds up negotiations, and honestly just takes the guesswork out of one of the biggest financial decisions you’ll make.

    If you’re planning to buy in the next few months, start with your credit score today — everything else falls into place faster once that’s sorted. [link to related guide on improving your CIBIL score here]

  • Vertical Gardening Ideas for Homes with Limited Space

    Vertical Gardening Ideas for Homes with Limited Space

    So you love the idea of a garden, but your “outdoor space” is basically a 4×6 balcony that gets sun for two hours a day. Sound familiar? You’re not alone — this is the reality for most apartment dwellers in cities like Jaipur, Mumbai, or Bengaluru, where land is expensive and balconies are an afterthought. The good news is that vertical gardening ideas exist precisely for this problem, and they work better than most people expect.

    Instead of asking “where do I put my plants,” vertical gardening flips the question to “how high can I go.” Walls, railings, old ladders, hanging hooks — they all become planting real estate. And once you start thinking this way, you realize you’ve been staring at unused space for years without noticing it.

    What Is Vertical Gardening, Really?

    Vertical gardening simply means growing plants upward instead of outward, using structures like trellises, wall panels, stacked planters, or hanging systems. It lets you fit ten or fifteen plants into a space that would otherwise hold two or three pots on the floor.

    I’ve noticed that people overcomplicate this at first. They imagine elaborate hydroponic wall systems from Pinterest and get overwhelmed. Truth is, a few sturdy hooks and some railing planters will get you 80% of the benefit for a fraction of the cost.

    Why Vertical Gardening Makes Sense for Small Homes

    Here’s the direct answer: Vertical gardening maximizes limited floor space, improves air circulation around plants, reduces pest problems (fewer plants sitting in stagnant corners), and lets renters garden without permanent changes to walls or floors. It’s practical, not just decorative.

    Beyond the space-saving angle, there’s something else — vertically arranged plants tend to get better light exposure since they’re not shading each other the way pots on a flat surface do. That alone can mean the difference between a struggling tomato plant and one that actually fruits.

    1. Railing Planters for Balconies

    If you have a balcony railing, you already have free real estate. Rectangular railing planters (available on Amazon India or local nurseries for roughly ₹300–₹800) hook directly onto the rail, no drilling needed.

    • Herbs like mint, coriander, and tulsi do well here
    • Marigolds add color without much fuss
    • Cherry tomatoes work too, though they’ll need staking

    One thing to watch: railing planters on higher floors can be risky in strong wind. Use ones with a locking clip, not just a hook.

    2. Wall-Mounted Pocket Planters

    Fabric or felt pocket organizers, the kind meant for shoes, work surprisingly well as vertical garden panels. Hang one on an exterior wall and fill each pocket with a small plant.

    Picture a small business owner in Jaipur who runs a home bakery — she has almost no outdoor space, just a narrow side wall near her kitchen door. She hung two felt pocket planters there and now grows enough mint and curry leaves for her own cooking. It cost her under ₹1,500 total, including the plants.

    Pocket planters dry out fast though. Expect to water every day in summer, maybe every other day in winter.

    3. Repurposed Ladder Shelving

    An old wooden ladder, laid against a wall, becomes an instant multi-tier plant stand. This is one of my favorite vertical gardening ideas because it costs almost nothing if you already have a ladder gathering dust in storage.

    Place trailing plants like pothos or string-of-pearls on the top rungs so they can cascade down. Lower rungs suit heavier pots that need stability.

    4. Stacked Planter Towers

    Stackable planters — plastic or terracotta towers with multiple tiers — are widely available now, and honestly, they’ve gotten a lot better looking in the last few years. A five-tier tower can hold strawberries, lettuce, or small chili plants and takes up barely a square foot of floor space.

    I’ll admit I was skeptical of these at first. The cheap plastic ones felt flimsy. But a decent terracotta or fiber-reinforced version, priced around ₹1,200–₹2,500, holds up fine for years.

    5. Trellises for Climbing Vegetables

    Got even a small patch of ground or a large deep container? A trellis lets beans, peas, cucumbers, or even small gourds climb instead of sprawl. Bamboo trellises are cheap, biodegradable, and easy to find at local nurseries.

    This is where vertical gardening genuinely outperforms traditional planting — a single trellis-trained cucumber vine can produce as much as three sprawling plants would, in a fraction of the ground space.

    6. Hanging Baskets from Ceiling Hooks

    Don’t ignore the space above your head. Ceiling hooks with hanging baskets work well for trailing plants — petunias, ferns, or even cherry tomatoes in a pinch.

    • Use S-hooks rated for at least 5kg
    • Water-resistant coco liners reduce mess from drips
    • Rotate baskets weekly for even light exposure

    7. Recycled Bottle or Pipe Gardens

    For a budget option, cut plastic bottles or PVC pipes horizontally and mount them in a row on a wall bracket. It’s not the prettiest option on this list, but it’s nearly free, and it’s a genuinely good project if kids are involved.

    8. Living Walls with Modular Panels

    On the higher end, modular green wall panels create a dense, lush look — the kind you see in trendy cafes. These run anywhere from ₹5,000 to ₹20,000+ depending on size and irrigation setup, so this one’s for people who are serious about the look and willing to invest.

    [link to related guide about balcony garden setup here]

    Choosing the Right Plants for Vertical Spaces

    Not every plant likes going vertical. Shallow-rooted herbs, trailing vines, and compact vegetables tend to do best. Deep-rooted plants like carrots or large root vegetables generally struggle in shallow vertical containers.

    [link to related guide about low-maintenance indoor plants here]

    Common Mistakes to Avoid

    • Overloading a single wall bracket beyond its weight limit
    • Ignoring drainage — vertical systems drip, and that water has to go somewhere
    • Placing sun-loving plants on a shaded wall just because it looks convenient
    • Forgetting that vertical planters dry out faster than ground pots, so watering schedules need adjusting

    [link to related guide about watering schedules for container plants here]

    FAQ

    Is vertical gardening suitable for apartments with no balcony? Yes, to an extent. Interior walls near a bright window can hold pocket planters or small shelving units. You won’t get the same range of plants as outdoor space allows, but herbs and low-light foliage plants do fine.

    How much does it cost to start a vertical garden at home? You can start small for under ₹1,000 using railing planters or a repurposed ladder. Modular living wall systems cost significantly more, often ₹5,000 and up.

    Do vertical gardens need more watering than regular pots? Generally, yes. Vertical systems have less soil volume per plant and dry out faster, especially in direct sun or wind. Daily checking during summer is a good habit.

    Can I grow vegetables in a vertical garden, or just decorative plants? Both. Cherry tomatoes, beans, peas, chilies, and leafy greens all grow well vertically. Bigger vegetables like pumpkins need sturdier support and more space.

    What’s the easiest vertical gardening idea for a total beginner? Railing planters or a stacked planter tower. Both require minimal setup, no drilling, and forgive a bit of neglect while you’re learning.

    Will vertical gardening damage my walls or balcony? Not if you use hooks, brackets, or free-standing structures rather than drilling directly into walls — especially important for renters. Always check with your landlord if you’re unsure.

    Final Thoughts

    Limited space doesn’t have to mean no garden. Whether it’s a single ladder shelf or a full modular wall, vertical gardening ideas give small homes a real shot at growing something green — and honestly, once you start, it’s hard to stop adding more. Pick one method from this list, try it for a season, and see what actually survives your specific balcony conditions before investing further. That’s the real test, not the Pinterest photo.

  • How to Attract Birds and Pollinators to Your Garden

    How to Attract Birds and Pollinators to Your Garden

    Ever sat in your garden and realized it’s completely silent? No birdsong, no bees buzzing around, nothing. Just leaves. That was me two summers ago, staring at a garden full of plants but strangely empty of life. If you’re looking to attract birds to garden spaces along with bees, butterflies, and the occasional curious squirrel, the fix usually isn’t complicated — it’s just that most gardens accidentally leave these creatures with nothing to eat, drink, or hide in.

    A garden that draws wildlife isn’t just prettier. It’s healthier too, because birds eat pests, and pollinators are the reason half your vegetable plants actually produce fruit. Skip this step and you’re basically gardening with one hand tied behind your back.

    Why Bother Attracting Birds and Pollinators?

    Here’s the short version: gardens with birds and pollinators see better fruit and vegetable yields, fewer pest infestations, and more natural balance overall. A single sparrow can eat hundreds of insects a day, and bees alone are responsible for pollinating a huge share of the food we eat.

    I used to think of birds as just a nice bonus, decoration almost. Then my neighbor’s guava tree, which had been struggling with aphids for two seasons straight, suddenly cleared up after a pair of bulbuls started nesting nearby. Coincidence? Maybe partly. But it changed how I think about garden pests.

    1. Plant Native and Flowering Species

    This is probably the single biggest lever you have. Native plants co-evolved with local birds and insects, so they recognize the food source instantly — non-native ornamentals often get ignored entirely.

    • Marigold, hibiscus, and tulsi work well across most of India and attract bees reliably
    • Sunflowers double as a bird feeder once they go to seed
    • Flowering shrubs like lantana pull in butterflies almost immediately, though some regions consider it semi-invasive, so check locally first

    Honestly, I’d skip most imported hybrid flowers if attracting wildlife is your main goal. They look nice but pollinators often just fly past them.

    2. Add a Reliable Water Source

    To attract birds to garden spaces effectively, water matters as much as food — sometimes more. A shallow dish, birdbath, or even an old clay pot lid filled with water gives birds a place to drink and bathe, especially critical during Indian summers when temperatures cross 40°C in many regions.

    Keep the water shallow, under 5cm deep, and change it every couple of days to avoid mosquito breeding. This part’s non-negotiable — a birdbath that becomes a mosquito nursery does more harm than good.

    3. Install Bird Feeders Strategically

    Feeders work, but placement is everything. Put one too close to a window and you’ll deal with birds flying into glass. Too close to the ground and cats become a problem.

    A few things that actually help:

    1. Hang feeders at least 1.5 to 2 meters off the ground
    2. Mix seed types — sunflower seeds, millet, and broken rice work well for Indian garden birds
    3. Clean feeders weekly; moldy seed makes birds sick

    Has this ever happened to you — you set up a feeder, wait weeks, and nothing shows up? Give it time. Birds need to discover a new food source, and that can take two to three weeks in a new garden.

    4. Grow a Pollinator-Friendly Flower Patch

    A dedicated patch, even a small one, changes things fast. Bees and butterflies are drawn to clusters of color rather than single scattered flowers.

    Attracting birds to garden areas works alongside this too, since insect activity draws insect-eating birds like drongos and mynas.

    • Group flowers in patches of at least 3-4 plants, not single stems scattered around
    • Choose a mix of bloom times so something is always flowering
    • Avoid pesticides here completely — this is the one spot in your garden where they’ll do the most damage

    5. Leave Some Mess (Yes, Really)

    Most garden advice tells you to clean up fallen leaves and dead branches. For attracting wildlife, do the opposite, at least in one corner. A small brush pile or a patch of unmowed grass gives insects somewhere to overwinter, which in turn feeds birds year-round.

    [link to related guide about low-maintenance garden design here]

    6. Skip the Pesticides, or at Least Cut Back Hard

    Pesticides don’t just kill the pest you’re targeting. They wipe out the bees and butterflies you’re trying to attract, plus whatever birds eat those insects. If you must treat something, go for neem oil or a targeted, localized spray rather than blanket spraying the whole garden.

    [link to related guide about organic pest control here]

    7. Provide Shelter and Nesting Spots

    Dense shrubs, small trees, or even a simple birdhouse give birds a reason to stay rather than just visit. Nesting boxes cost as little as ₹300–₹600 and can be mounted on a wall or tree trunk facing away from direct afternoon sun.

    Common Mistakes That Keep Wildlife Away

    • Using chemical pesticides even occasionally, which undoes months of other efforts
    • Placing feeders or baths in spots with no nearby cover, leaving birds exposed to predators
    • Expecting instant results — most gardens take a full season to start seeing regular visitors
    • Forgetting to keep water and feeders clean, which can spread disease among birds

    [link to related guide about seasonal garden maintenance here]

    FAQ

    How long does it take to attract birds to a new garden? Usually a few weeks to a couple of months. Birds need to notice food and water sources exist, and that takes repeated visits before they trust a new spot enough to return regularly.

    What flowers attract the most pollinators in Indian gardens? Marigold, tulsi, hibiscus, and lantana are reliable performers across most Indian climates. Sunflowers and zinnias also draw both bees and butterflies well.

    Do bird feeders attract unwanted pests like rats? They can, if seed is left scattered on the ground. Use a tray feeder and clean up spilled seed regularly to keep this from becoming a problem.

    Is it safe to use pesticides if I also want pollinators? Not really. Even organic-labeled pesticides can harm bees if sprayed directly on flowers. Neem oil applied in the evening, away from open blooms, is a safer middle ground.

    Can a balcony or terrace garden attract birds too? Yes, especially with a small water dish and a few flowering pots. Height actually helps here since many birds prefer feeding above ground level, away from cats.

    Will attracting birds also attract squirrels and other animals? Often, yes. Most people find this a welcome side effect, though if squirrels start raiding vegetable beds, a physical barrier around those specific plants usually solves it without affecting the birds.

    Final Thoughts

    A garden that draws birds, bees, and butterflies isn’t built overnight, but the fixes are genuinely simple — water, native flowers, a bit of shelter, and laying off the pesticides. Once you start to attract birds to garden spaces regularly, you’ll notice the difference within a season, both in the birdsong and in how much healthier your plants look. Start with just the birdbath this week and see what shows up.

  • 8 Signs of a Hidden Water Leak in Your Home (2026 Guide)

    8 Signs of a Hidden Water Leak in Your Home (2026 Guide)

    Your water bill came in ₹1,200 higher than last month and nothing in the house looks different. No puddles, no damp patches, nothing obviously wrong. Sound familiar?

    This is exactly how most people discover the signs of a hidden water leak — not by seeing water, but by everything else around them slowly going wrong. Walls, floors, ceilings, even your electricity bill can start telling you something’s off long before you spot an actual drip.

    The tricky part is that hidden leaks, by definition, hide. They’re behind walls, under slabs, inside ceiling cavities. By the time you notice, you could be looking at months of slow damage. Let’s go through what to actually watch for.

    An Unexplained Spike in Your Water Bill

    Direct answer: If your water bill rises 20% or more without a change in your usage habits, that’s one of the clearest signs of a hidden water leak. A running toilet or a slow pipe leak can waste over 900 litres a week without anyone noticing.

    This is usually the first clue people get, and honestly, it’s the most reliable one. Water bills don’t lie the way our memory does.

    Here’s a simple check: turn off every tap and appliance in the house, then look at your water meter. Wait 30 minutes without using any water at all. If the meter’s still moving, you’ve got a leak somewhere in the system.

    I’ve noticed a lot of people assume a higher bill just means “we used more water this month” and move on. Don’t do that. Compare it against the same month last year, not just last month — seasonal usage varies, but a genuine leak shows up as a pattern, not a one-off.

    Damp Patches, Discoloration, or Peeling Paint on Walls

    Yellowish-brown stains on a wall or ceiling are one of the more obvious signs of a hidden water leak, but people write them off as “monsoon dampness” way too often.

    A few things to look for specifically:

    • Paint bubbling or peeling in a spot that isn’t near a window or exterior wall
    • A patch that keeps reappearing even after repainting
    • Discoloration that’s slightly warm or soft to the touch (this usually means active moisture, not old damage)

    Picture a family in a second-floor flat in Pune noticing a faint yellow ring on their bedroom ceiling every monsoon. They repainted it three years running, assuming it was just seepage from the terrace above. Turned out a pipe joint behind that wall had been leaking slowly the entire time — the monsoon just made it more visible, it wasn’t the actual cause.

    Musty Smells That Won’t Go Away

    If a room smells faintly damp or musty even when it’s clean and dry, that’s worth investigating. Mold and mildew love hidden moisture, and they show up as smell way before they show up as visible growth.

    This is especially common in:

    • Under-sink cabinets in kitchens and bathrooms
    • Areas near washing machine connections
    • Basements or ground-floor rooms in older buildings

    If you catch this early, it’s a lot cheaper to fix. Mold remediation after months of unnoticed leaking can run into tens of thousands of rupees, versus a few hundred for a pipe repair caught early.

    Sound of Running Water With Everything Off

    This one’s almost eerie when you first notice it. Has this ever happened to you — you’re lying in bed at night and hear a faint hissing or trickling sound, but every tap in the house is off?

    That’s often water moving through a pipe that shouldn’t have water moving through it at all. It’s one of the more unsettling signs of a hidden water leak, mostly because it’s so easy to convince yourself you imagined it.

    Walk around the house at night when it’s quiet — check near the water heater, under sinks, and along any exposed pipe runs. If you consistently hear it in one spot, that’s your starting point.

    Cracks in Walls or Flooring

    Water that seeps into concrete or soil beneath a foundation can cause slow structural shifting over time. Small cracks appearing in walls, especially near the floor, or tiles that feel slightly uneven underfoot, can point to water damage happening below the surface.

    This isn’t something to panic over immediately — buildings settle naturally too. But if cracks appear suddenly, or widen over a few weeks, get it checked rather than assuming it’s normal wear.

    [link to related guide on foundation repair basics here]

    Mold or Mildew Growth in Unexpected Places

    Visible mold — usually black, green, or grey spots — on walls, grout lines, or wooden furniture is a late-stage sign, meaning the leak’s probably been active for a while already.

    Bathroom mold near the shower is normal and expected. Mold appearing on a bedroom wall, inside a wardrobe, or on furniture legs is not normal, and it’s one of the signs of a hidden water leak people dismiss the longest because it doesn’t scream “plumbing problem” the way a puddle does.

    Warped or Buckling Flooring

    Wooden or laminate flooring that starts to warp, buckle, or feel spongy underfoot is a strong indicator of moisture underneath. Tiles that sound hollow when tapped, or that have started lifting slightly at the edges, tell a similar story.

    This tends to happen slowly enough that people adjust without noticing — you just get used to that one floorboard that creaks differently now. Worth paying attention to rather than ignoring.

    Higher Humidity or Foggy Windows Indoors

    If your windows fog up more than they used to, or a room just feels noticeably more humid than the rest of the house, hidden moisture could be the reason. This is subtler than the other signs and easy to blame on weather, but a consistent humidity difference between rooms is worth checking out.

    [link to related guide on choosing a reliable local plumber here]

    FAQ: Common Questions About Hidden Water Leaks

    Q: How can I tell if I have a hidden water leak without cutting into walls? Start with a water meter test — turn everything off and watch if the meter still moves. Combine that with checking your last few water bills and doing a walk-through for damp smells or discoloration.

    Q: Can a hidden leak cause health problems? Yes, mainly through mold growth. Prolonged exposure to damp, moldy environments can trigger allergies and respiratory irritation, especially in kids and older family members.

    Q: How much water can a small hidden leak waste in a month? Even a slow, barely-visible leak can waste several thousand litres a month. A running toilet alone can waste over 200 litres a day if left unchecked.

    Q: Is it normal to have some dampness on walls during monsoon? Some surface dampness on exterior walls is common, yes. But dampness on interior walls, or patches that don’t dry out once the season passes, usually points to something more than just seasonal humidity.

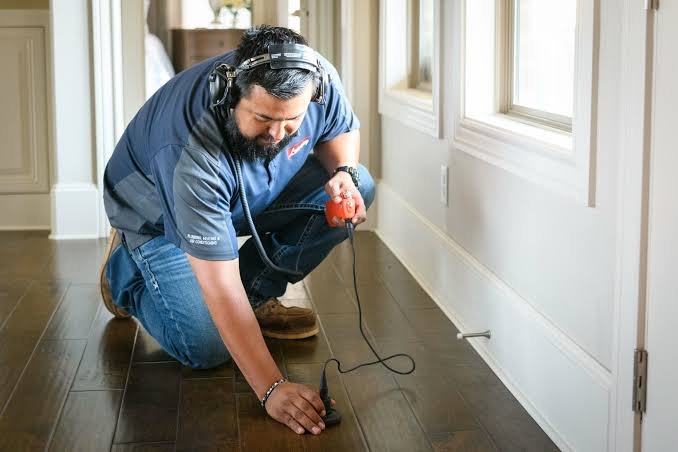
    Q: Should I call a plumber or a leak detection specialist? For a leak you can locate yourself, a regular plumber works fine. For leaks hidden inside walls or under flooring, a specialist with acoustic or thermal leak detection equipment will save you a lot of unnecessary wall-breaking.

    Q: How often should I check for hidden leaks? A quick water meter check every couple of months is a reasonable habit, along with a general walk-through after every monsoon season when moisture-related issues tend to surface.

    Conclusion

    Hidden leaks rarely announce themselves loudly — it’s usually a string of small, easy-to-dismiss clues that add up over weeks or months. An odd smell here, a slightly higher bill there, a ceiling stain you keep repainting over instead of investigating. Catching the signs of a hidden water leak early is genuinely one of the cheapest home maintenance habits you can build, since the cost of ignoring it only grows. Next time something feels slightly off — a smell, a sound, a bill that doesn’t add up — trust that instinct and take fifteen minutes to check it out. It’s a lot cheaper than the alternative.

  • How to Unclog a Drain Without Calling a Plumber (2026 Guide)

    How to Unclog a Drain Without Calling a Plumber (2026 Guide)

    Water pooling around your feet in the shower is never a good sign. You jiggle the plug, you wait, and… nothing. If you’re googling how to unclog a drain right now, chances are you’ve already tried running hot water and hoping for a miracle. It usually doesn’t work that way.

    Here’s the good news — most household clogs aren’t complicated. They’re hair, soap scum, grease, or the occasional stray bottle cap your kid dropped in. You genuinely don’t need a plumber for 80-90% of these. You need the right technique, ten minutes, and maybe a trip to the kitchen cabinet.

    Let’s get into it.

    Why Drains Get Clogged in the First Place

    Before you fix it, it helps to know what you’re dealing with. Bathroom drains clog mostly from hair and soap residue clumping together. Kitchen sinks clog from grease, food particles, and coffee grounds (please stop pouring these down the sink, by the way).

    Older homes — especially ones with cast iron or narrow PVC piping — tend to clog faster because of mineral buildup over the years. I’ve noticed that flats built before the early 2000s in a lot of Indian cities still have those older pipe widths, and they just don’t drain the way newer construction does.

    How to Unclog a Drain With Boiling Water

    Direct answer: Boil a full kettle of water, let it sit off heat for 30 seconds (so it doesn’t crack PVC pipes), then pour it down the drain in two or three stages, waiting 10-15 seconds between pours. This works best on grease-based clogs.

    This is genuinely the first thing to try, every single time, before anything else on this list. It costs nothing and takes five minutes.

    A few notes on doing it right:

    • Don’t pour boiling water straight from the stove into PVC pipes — let it cool slightly first, or you risk warping the plastic
    • Pour slowly, not all at once
    • Repeat 2-3 times if the water is still draining slowly

    This trick works great on kitchen sinks with grease buildup. It’s less effective on hair clogs in bathroom drains — for those, skip to the next section.

    Baking Soda and Vinegar — Does It Actually Work?

    I’ll be honest, this one’s a bit overhyped online, but it’s not useless either. It works best as a maintenance step, not a cure for a fully blocked drain.

    Here’s the method:

    1. Pour half a cup of baking soda down the drain
    2. Follow with half a cup of white vinegar
    3. Cover the drain (a wet cloth works fine) and let the fizzing reaction sit for 15-20 minutes
    4. Flush with hot water

    The fizzing helps break down light gunk and soap film, but it won’t cut through a solid hair clump. Think of it as a monthly preventive habit rather than an emergency fix. Do this once a month and you’ll probably call a plumber a lot less often.

    Using a Plunger the Right Way

    Most people use a plunger wrong. They just pump it a couple of times and give up. There’s actually a technique here.

    Direct answer: Fill the sink or tub with a couple of inches of water first, so the plunger creates suction against a sealed surface, not air. Place it fully over the drain, push down slowly, then pull up sharply. Repeat 8-10 times before checking results.

    A few things that make a real difference:

    • Use a cup plunger for sinks, not the flange-style one meant for toilets
    • Block any overflow hole (that little gap near the top of the sink) with tape or a wet rag — otherwise you lose suction
    • Petroleum jelly around the plunger’s rim improves the seal significantly

    Has this ever happened to you — you plunge for two minutes, nothing moves, and you’re about to give up? Try adding more water before your next attempt. Low water level is the number one reason plunging fails.

    The Wire Hanger or Drain Snake Trick

    For hair clogs specifically, this is honestly your best bet. Straighten a wire coat hanger, bend a small hook at one end, and fish it down the drain. Twist as you go — you’re trying to snag the hair clump, not push it deeper.

    It’s gross, I won’t pretend otherwise. But it works better than most chemical cleaners for bathroom drains, and it costs you nothing beyond a hanger you already own.

    If you want something less improvised, a plastic drain snake (sold at most hardware stores for around ₹150-300) does the same job with less mess. Picture a small business owner in Jaipur running a salon out of a rented shop — this ₹200 tool has probably saved them thousands in plumber call-outs over the years, especially with the volume of hair going down those drains daily.

    Should You Use Chemical Drain Cleaners?

    Direct answer: Chemical drain cleaners work, but use them sparingly. They’re harsh on older pipes, harmful if mishandled, and shouldn’t be your first option. Save them for stubborn clogs that survive boiling water, plunging, and manual removal.

    If you do go this route:

    • Always ventilate the room
    • Never mix different brands or types of cleaner together — this can create dangerous fumes
    • Don’t use them right after a plunging attempt, since standing chemical water can splash back

    [link to related guide about eco-friendly home cleaning products here]

    Preventing Clogs Before They Start

    Prevention genuinely beats cure here, and it’s less effort than it sounds.

    • Use a drain guard or mesh strainer in the shower and kitchen sink — this alone stops most hair and food particle clogs
    • Never pour cooking oil or ghee down the sink; let it cool and bin it instead
    • Run hot water down the kitchen drain once a week
    • Clean your drain guard weekly, not “whenever I remember”

    Small habit, big payoff. I switched to a mesh strainer in my own kitchen sink about two years back and genuinely haven’t had a serious clog since — that’s the kind of low-effort fix that actually holds up.

    When to Actually Call a Plumber

    Not every clog is a DIY job, and there’s no shame in knowing your limits. If multiple drains in the house are backing up at once, that usually points to a main sewer line issue — not something a plunger fixes. Same goes for gurgling sounds from other drains when you flush the toilet, or water backing up from unexpected places like the shower when you run the washing machine.

    [link to related guide on choosing a reliable local plumber here]

    If you’ve tried boiling water, plunging, and a drain snake and the clog’s still there after two attempts, it’s probably time to call in a professional rather than reaching for stronger and stronger chemicals.

    FAQ: Common Questions About Unclogging Drains

    Q: How do I unclog a drain that’s completely blocked, not just slow? Start with the plunger method using extra water, then move to a drain snake or wire hanger for physical removal. Boiling water alone usually won’t cut through a full blockage.

    Q: Is it safe to use baking soda and vinegar every week? Yes, it’s actually a good weekly habit for prevention. Just don’t rely on it as your only fix once a clog has already formed.

    Q: Why does my sink drain slow, then stop completely a day later? That’s usually a partial clog getting worse as more debris sticks to it. Best to act on slow drainage immediately rather than waiting for it to fully block.

    Q: Can I use Coca-Cola to unclog a drain? I’ve seen this online. It’s mostly a myth exaggerated by the internet. The carbonic acid is way too mild to break down real clogs — you’re better off with vinegar and baking soda.

    Q: How often should I clean my drains to avoid clogs? A weekly hot water flush plus a monthly baking soda treatment is a solid routine for most households.

    Q: Are chemical drain cleaners bad for my pipes long-term? Frequent use can corrode older or plastic piping over time. Use them occasionally, not as a monthly habit.

    Conclusion

    Most clogged drains really don’t need a plumber’s visit — just some hot water, a plunger used properly, or a wire hanger and a bit of patience. Keep a mesh strainer in your drains and you’ll probably avoid most of this altogether. Next time water starts pooling around your ankles, try one of these methods before you pick up the phone. Save the plumber’s number for the genuinely tricky stuff — main line blockages, multiple drains backing up together, that sort of thing. For everything else, you’ve got this.

  • Move Out Cleaning Checklist: What Landlords Actually Check

    Move Out Cleaning Checklist: What Landlords Actually Check

    Moving day is chaotic enough without wondering whether you’ll get your full security deposit back. If you’ve ever handed over the keys and then waited nervously for weeks, hoping your landlord doesn’t find a reason to deduct ₹5,000 for “cleaning charges,” you know exactly why a proper move out cleaning checklist matters.

    Here’s the truth: most deposit disputes aren’t about damage. They’re about cleaning. A landlord walks in, sees dust on the fan blades or a greasy stovetop, and suddenly there’s a “deep cleaning fee” on your final bill. I’ve seen this happen to friends more times than I’d like to admit.

    This guide walks through exactly what to clean, room by room, whether you’re moving out of a rented flat in Bengaluru or handing over keys to new tenants moving in.

    Why a Move Out Cleaning Checklist Saves You Money

    Direct answer: A move out cleaning checklist protects your security deposit by ensuring nothing gets missed during the final inspection. Landlords in most Indian cities deduct anywhere from ₹2,000 to ₹15,000 for cleaning issues alone, and a systematic checklist prevents that entirely.

    Think about it from the landlord’s side for a second. They’re not trying to scam you (usually). They just need the flat rental-ready for the next tenant, fast. If you hand it over spotless, there’s no incentive to nitpick.

    I’ve noticed that people who write things down and go room by room almost never get disputed. The ones who “eyeball it” the morning of the move? They’re the ones calling their landlord a week later, arguing over WhatsApp screenshots of stains.

    Kitchen Cleaning: The Area Landlords Scrutinize Most

    The kitchen is where deposits go to die. Grease builds up in places you don’t even think about until you’re staring at them with a torch light.

    Here’s what needs attention:

    • Stovetop and burners — degrease with a mix of dish soap and warm water, or baking soda paste for stubborn spots
    • Chimney and exhaust fan filters, if your flat has one — these get shockingly greasy within a year
    • Inside and outside of cabinets, including the tops (dust collects there and nobody checks until moving day)
    • Refrigerator, if it belongs to the landlord — empty, defrost, and wipe down every shelf
    • Sink and countertops, scrubbed and dried (water spots look worse than they are, but still)

    Picture a young professional in Pune wrapping up a two-year lease. She spent three hours on everything except the chimney filter — and that’s exactly what her landlord flagged first. Don’t skip the parts you can’t see easily.

    Bathroom Deep Cleaning Before You Hand Over Keys

    Direct answer: Bathrooms need descaling of taps and showerheads, tile grout scrubbing, and mold removal from corners and ceiling edges. Use a vinegar-water solution for hard water stains and a bleach-based cleaner for mold, always with proper ventilation.

    Hard water leaves those chalky white deposits on taps and shower glass, especially common in cities with harder water supply. A simple vinegar soak — wrap a cloth soaked in vinegar around the tap for 20 minutes — usually clears it without scrubbing yourself tired.

    Mold in bathroom corners is the other big one. It’s not just cosmetic; it signals poor ventilation, and some landlords will genuinely worry about it affecting the next tenant. Clean it thoroughly, and if the exhaust fan hasn’t been working right, mention that too — better to flag it than get blamed for it.

    Bedroom and Living Room Cleaning Tasks

    These rooms feel easier, but they’re where people cut corners the most because “it just looks clean.”

    1. Dust ceiling fans, light fixtures, and the tops of door frames
    2. Wipe down window sills and tracks — dust and dead insects collect here constantly
    3. Clean inside wardrobes and drawers, including corners
    4. Vacuum or mop under furniture (moving the bed reveals a lot, trust me)
    5. Wash or wipe down switchboards and light switches — an oddly common inspection point

    Walls with scuff marks or nail holes deserve a mention too. A little touch-up paint or filler goes a long way toward avoiding a “wall damage” deduction. [link to related guide on removing wall marks and scuffs here]

    Move In Cleaning: What New Tenants Should Check

    If you’re the one moving in rather than out, your priorities shift slightly. You’re not trying to satisfy an inspection — you’re trying to make sure the last tenant actually did.

    Before unpacking a single box, check these:

    • Test all taps and drains for leaks or slow drainage
    • Open every cabinet and drawer to check for leftover mess or pests
    • Inspect for mold in bathroom and kitchen corners
    • Run the exhaust fans and AC to confirm they work
    • Photograph any existing damage immediately, dated, before you move furniture in

    This last one matters more than people realize. Has this ever happened to you — moving out a year later and getting blamed for a scratch that was already there? A few photos on day one saves that argument entirely.

    Deep Cleaning vs. Regular Cleaning: What’s Actually Required

    Not every move requires a full professional deep clean, and honestly, I don’t think it’s always necessary. If you’ve kept the place reasonably maintained through your tenancy, a thorough weekend clean using this checklist usually covers it.

    That said, for longer tenancies (three years or more) or flats with pets, professional deep cleaning services in most Indian metros run between ₹3,000 and ₹10,000 depending on the flat size, and it’s often worth the cost just for the peace of mind. [link to related guide on professional deep cleaning services here]

    Common Move-Out Cleaning Mistakes to Avoid

    A few things trip people up every single time:

    • Forgetting the balcony — dust, dried leaves, and bird droppings are easy to overlook but very visible
    • Cleaning right before the truck arrives instead of a day earlier, leaving no buffer for touch-ups
    • Skipping the AC filter, which collects dust fast and is a quick five-minute clean
    • Assuming the landlord “won’t notice” — they almost always do, especially around deposit time

    Frequently Asked Questions

    How long does move out cleaning usually take? For a standard 2BHK, plan for 4-6 hours if you’re doing it yourself, spread across a day or two. A professional team typically finishes in 3-4 hours with the right equipment.

    Do I need to clean the walls before moving out? Wipe down visible marks and scuffs, yes. Full repainting isn’t usually required unless your lease agreement specifically states it or the walls have significant damage.

    Can a landlord deduct the full deposit for cleaning? Only if the flat is left genuinely dirty or damaged, and even then, deductions should be reasonable and itemized. Keep photos of the cleaned flat as proof if there’s ever a dispute.

    Is it worth hiring professional cleaners for moving out? For larger homes, long tenancies, or if you’re short on time, yes — it’s often cheaper than losing part of your deposit over missed spots.

    What should I clean first when moving in? Start with the kitchen and bathroom since they’re most likely to have hidden grime or leftover mess, then move on to floors and cabinets before unpacking anything.

    Should I take photos during move out cleaning? Absolutely. Photograph every room once cleaned, with a timestamp if possible — it’s the easiest way to protect your deposit if a disagreement comes up later.

    Final Thoughts

    Getting your full deposit back really comes down to being systematic, not spending your entire weekend scrubbing. Work through each room with this move out cleaning checklist, don’t skip the spots people usually forget — chimney filters, AC vents, window tracks — and document everything with photos before you leave.

    Whether you’re the one leaving or the one walking into a new place in 2026, a little planning here saves a lot of arguing later. Print this checklist, keep it on your phone, and tick things off as you go — future you will thank present you.

  • How to Remove Carpet Stains: 8 Methods That Actually Work

    How to Remove Carpet Stains: 8 Methods That Actually Work

    You just hosted a dinner party. Someone knocked over a glass of red wine on your cream-colored carpet, and now there’s a dark blotch sitting right in the middle of your living room. If you’ve ever wondered how to remove carpet stains without calling a professional cleaner every single time, you’re in the right place.

    Here’s the thing — most stains aren’t actually permanent. They just feel that way in the panicked five minutes right after they happen. With the right approach (and a little patience), you can handle almost anything at home. I’ve ruined exactly one rug trying to rush a stain, and I’ve saved a dozen more by slowing down. Let’s get into it.

    Why Acting Fast Matters More Than the Product You Use

    Direct answer: The single biggest factor in removing carpet stains is speed, not the cleaning product. A stain treated within 5-10 minutes lifts far more easily than one left to dry, because the liquid hasn’t had time to bond with carpet fibers.

    I know it’s tempting to grab your phone and search for “best carpet stain remover in India” the moment something spills. Don’t. Grab a cloth first. Every minute you spend scrolling is a minute the stain sinks deeper into the fibers.

    Blot — don’t rub. Rubbing pushes the stain further into the pile and can fray the fibers, especially on wool or silk blends. Use a clean white cloth (colored cloths can transfer dye) and press down firmly, working from the outside of the stain inward.

    How to Remove Carpet Stains From Wine and Juice

    Red wine is the stain everyone panics about, and honestly, it’s one of the easier ones once you know the trick.

    Here’s what’s worked for me more times than I can count:

    1. Blot up as much liquid as possible with a dry cloth.
    2. Mix 1 tablespoon of dish soap with 2 cups of warm water.
    3. Apply a small amount with a cloth, blot, and repeat.
    4. For stubborn spots, sprinkle a little salt or baking soda while the stain is still damp — it draws the wine out as it dries.
    5. Vacuum once dry.

    Fruit juice and turmeric stains (a very real problem in most Indian kitchens) respond well to the same soap-and-water method, though turmeric can be stubborn. A paste of baking soda and water left on for 15-20 minutes usually does the trick before you resort to anything stronger.

    Removing Coffee and Tea Stains From Carpets and Upholstery

    Direct answer: For coffee and tea stains, blot excess liquid immediately, then apply a mix of white vinegar, water, and a drop of dish soap. Let it sit for 5 minutes before blotting dry — the acidity in vinegar breaks down the tannins that cause discoloration.

    Coffee stains oxidize as they dry, which is why that light brown spill sometimes turns into a darker, almost rust-colored mark overnight. This is one reason I keep a small spray bottle of diluted vinegar solution under my sink at all times — it’s genuinely the fastest fix for both coffee and tea.

    If the stain has already set, don’t give up. Old coffee stains just need a longer soak time and maybe two or three rounds of treatment instead of one.

    Tackling Pet Stains and Odors on Carpets

    Pet owners, this section is for you. Urine, vomit, and other “accidents” are a different category entirely because you’re not just fighting a stain — you’re fighting an odor that regular soap won’t touch.

    An enzyme-based cleaner is non-negotiable here. Regular detergent might lift the visible mark, but it won’t break down the uric acid crystals that keep smelling long after the stain looks gone. Has your dog ever gone back to the same spot again and again? That’s usually why — they can still smell it even when you can’t.

    • Blot up fresh liquid immediately (don’t let it soak deeper)
    • Apply an enzyme cleaner and let it sit per the label instructions, usually 10-15 minutes
    • Avoid steam cleaning pet stains before the enzyme treatment — heat can set the protein and make it permanent
    • Repeat if the odor lingers after 24 hours

    How to Get Blood Stains Out of Carpet

    Blood is a protein-based stain, and that changes everything about how you treat it. Hot water actually cooks the protein into the fibers — the opposite of what you want.

    Always use cold water for blood. Mix cold water with a small amount of dish soap, dab it onto the stain, and blot repeatedly. Hydrogen peroxide works too, but test it on a hidden patch of carpet first since it can lighten some dyes.

    Ink, Grease, and Oil Stains: The Trickiest Category

    Picture a small business owner in Jaipur running a boutique with a carpeted showroom — a customer’s pen leaks, or a food delivery bag drips oil near the entrance. These stains scare people more than they should.

    Direct answer: For ink stains, dab (never rub) with rubbing alcohol on a cotton ball, working from the edges inward. For grease and oil, sprinkle cornstarch or baking soda first to absorb the oil, wait 15 minutes, vacuum, then treat with dish soap and water.

    A few things I’ve learned the hard way with this category:

    • Rubbing alcohol works on ballpoint ink but can bleed the ink further if you scrub instead of dab
    • Grease stains almost always need the absorb-first approach — jumping straight to soap and water just spreads the oil around
    • Nail polish stains respond to acetone-based remover, but only on synthetic carpets — it can melt certain fibers, so patch-test always

    Homemade vs. Store-Bought Carpet Stain Removers

    I’ll be honest — I don’t think you always need a fancy branded product. For most everyday spills, a mix of dish soap, water, and white vinegar handles 80% of what lands on your carpet. That said, for pet stains and old, set-in marks, an enzyme cleaner or a proper commercial spot remover genuinely does perform better. It’s not just marketing.

    Some readers disagree with me on this, and that’s fair — if you’ve got young kids or pets and spills happen weekly, keeping a dedicated commercial cleaner on hand probably saves you time in the long run. [link to related guide on best carpet cleaning products in India here]

    Deep Cleaning: When DIY Isn’t Enough

    Sometimes a stain has been there for months, or it covers a large area, and spot treatment just won’t cut it anymore.

    This is where steam cleaning or shampooing the whole carpet comes in. You can rent a machine for a few hundred rupees a day in most Indian cities, or hire a professional service — expect to pay anywhere from ₹3 to ₹8 per square foot depending on your city and the carpet type in 2026.

    A few signs you need deep cleaning rather than spot treatment:

    • Multiple old stains scattered across the carpet
    • A general dullness or graying, even without visible spots
    • A musty smell that spot cleaning hasn’t fixed
    • It’s been more than a year since the last full clean

    [link to related guide on choosing between steam cleaning and dry carpet cleaning here]

    Preventing Future Stains on Carpets and Upholstery

    Direct answer: The most effective way to prevent carpet stains is applying a fabric protector spray after cleaning, using doormats at every entrance, and treating spills within the first few minutes rather than waiting.

    Fabric protectors like Scotchgard create a barrier that gives you extra time before liquid soaks in — it won’t make your carpet stain-proof, but it buys you crucial minutes. Combine that with a “no shoes indoors” habit and a stain kit kept in an accessible spot, and you’ll cut your carpet emergencies down dramatically.

    Frequently Asked Questions

    Does baking soda actually remove carpet stains? Yes, especially for odors and fresh spills. It works by absorbing moisture and neutralizing smells, though for set-in or colored stains it works best paired with vinegar or dish soap rather than alone.

    Can I use bleach on carpet stains? Generally, no — bleach discolors most carpet fibers, especially wool and any dyed synthetic. Stick to oxygen-based cleaners or diluted vinegar instead unless your carpet is specifically labeled bleach-safe.

    How do I remove old, dried carpet stains? Rewet the area slightly with warm water first, then apply your chosen cleaning solution and let it sit longer than you would for a fresh stain — sometimes 20-30 minutes. It may take two or three rounds.

    Is vinegar safe for all carpet types? Mostly, yes, when diluted with water. But wool carpets can be more sensitive, so always test a hidden corner first before treating a visible area.

    Why does my carpet stain keep coming back after cleaning? This usually happens with pet stains or spills that weren’t fully extracted — some residue is still sitting deep in the padding underneath, and it wicks back up to the surface as the carpet dries.

    Should I hire a professional or DIY it? For fresh, small stains, DIY almost always works fine. For large areas, old stains, or anything involving pet accidents on padding, a professional deep clean tends to give better long-term results.

    Final Thoughts

    Stains happen — that’s just life with carpets and upholstery. What matters is knowing which method fits which stain, and not panicking the moment something spills. Keep a small kit ready (dish soap, white vinegar, baking soda, and a couple of clean cloths), act quickly, and you’ll handle most situations without breaking a sweat.

    If your carpet’s been through a lot over the years and spot treatment isn’t cutting it anymore, it might just be time for a proper deep clean. Either way, don’t let one wine glass ruin your evening — or your carpet.

  • How to Prevent Break-Ins: Real Tips That Actually Work in 2026

    How to Prevent Break-Ins: Real Tips That Actually Work in 2026

    A friend of mine got robbed last monsoon. Nothing dramatic — no broken windows, no drama. Someone just walked in through a back door that never got locked because “who’s going to bother with the back gate?” That’s usually how it happens. Not a movie-style break-in, just an open door and bad timing.

    Home security isn’t complicated, but it does need to be deliberate. Between better door hardware, smarter habits, and picking from the best smart locks 2026 has to offer, most break-ins are genuinely preventable. This isn’t about turning your home into a fortress. It’s about removing the easy opportunities that burglars actually look for.

    Why Most Break-Ins Are Crimes of Opportunity

    Here’s the direct answer: most burglars aren’t professionals casing a target for weeks. They’re opportunists looking for an unlocked door, an empty-looking house, or a window left open. Remove the opportunity, and most would-be intruders simply move on to an easier target.

    Burglars generally spend very little time deciding whether to enter a house. If it looks occupied, locked up properly, and mildly inconvenient to access, they’ll skip it. I’ve noticed people overspend on cameras while ignoring the basics — a solid lock and a habit of actually using it beats a fancy camera system nobody checks.

    Doors remain the most common entry point, followed by ground-floor windows. That alone tells you where to focus first.

    Start With the Front Door (It Matters More Than You Think)

    Your front door is doing more work than any other part of your home security setup. A weak lock here undoes everything else you might do.

    A few things worth checking today, not next month:

    • Is your main door lock a single-point latch, or something with real resistance?
    • Does the door frame itself feel solid, or does it flex when you push it?
    • Have you changed the locks since moving in? Previous tenants and their spare keys are an underrated risk.

    This is exactly where upgrading matters. Among the best smart locks 2026 offers, most combine fingerprint access with a PIN backup and a tamper alarm — three layers instead of one mechanical latch that a determined person can pick or force. It’s not about paranoia. It’s about not being the easiest house on the street.

    Don’t Ignore Windows and Secondary Doors

    Quick answer: windows and back or side doors account for a large share of break-ins because homeowners focus almost all their attention on the front door. Secure every entry point, not just the obvious one, including ground-floor windows and service doors.

    Picture a small business owner in Jaipur who locks the shutter every night but leaves the back storeroom door on a simple latch because “nobody comes from that side.” That’s the exact gap burglars look for — the point nobody’s thinking about.

    Practical fixes here don’t need to be expensive:

    1. Add secondary latches or keyed locks on ground-floor windows
    2. Trim any bushes or landscaping that hide a side door from view
    3. Fit a simple bar or block on sliding doors so they can’t be forced open
    4. Consider grilles for windows facing isolated areas, even if it’s not your main door

    Lighting Changes More Than People Expect

    Motion-activated lighting outside your home does something cameras alone can’t — it works before anyone even tries to break in. A sudden light is enough to make most people reconsider.

    Dark corners near entry points are basically an invitation. If your porch or side gate sits in shadow after sunset, that’s worth fixing before anything else on this list.

    Make Your Home Look Occupied, Even When It’s Not

    An empty-looking house is easier to target than one that seems lived in. This matters more during long trips — weddings, vacations, that annual visit to your hometown.

    A few low-effort habits help:

    • Ask a neighbor to collect your mail or move a parked scooter occasionally
    • Use a timer plug for a light or two instead of leaving everything dark
    • Don’t announce travel dates on social media before you’ve actually left
    • Keep curtains in a normal, lived-in position — fully drawn for two weeks looks exactly like what it is

    Where Smart Locks Actually Fit Into Your Security Plan

    Smart locks aren’t a replacement for good habits, but they do remove one of the weakest links — the physical key. Among the best smart locks 2026 options, look for ones offering at least two access methods, a metal body suited to Indian humidity, and a tamper alert that triggers on forced entry attempts.

    The real advantage isn’t the fingerprint sensor, honestly. It’s the access log — knowing exactly when your door was opened, and by whom, without relying on memory or guesswork. That matters more than people expect until they actually have it.

    [link to related guide comparing the best smart locks 2026 by brand and price here]

    Cameras and Video Doorbells: Worth It, But Not a Silver Bullet

    A visible camera or doorbell camera does deter some burglars simply because most don’t want to be recorded. But a camera that nobody checks in real time is really just evidence after the fact, not prevention.

    If you’re adding one, place it where it’s visible, not hidden — the deterrent effect matters more than catching someone after the damage is done.

    [link to related guide on choosing a home security camera system here]

    Simple Daily Habits That Cost Nothing

    • Lock the door even for a five-minute grocery run. Especially then, actually.
    • Never leave a spare key under the mat or a flowerpot — it’s the first place anyone looks.
    • Keep valuables away from windows where they’re visible from outside.
    • Teach kids and domestic staff not to open the door to strangers, even ones claiming to be from a utility company.

    Has this ever happened to you — stepping out “for two minutes” and leaving the door unlocked? It’s a small habit, but it’s the one that gets exploited most often.

    Frequently Asked Questions

    What’s the single most effective way to prevent a break-in? Removing easy opportunity matters more than any single gadget. A solid, properly locked door combined with visible signs that someone’s home does more than an expensive setup used inconsistently.

    Are smart locks actually more secure than traditional ones? Generally yes, mainly because they combine multiple access layers and eliminate the risk of a copied physical key. Installation quality matters just as much as the lock itself, though.

    Do burglars really avoid homes with cameras? Many do, since visible surveillance increases the chance of being identified. It’s a deterrent, not a guarantee, so it works best alongside solid locks and lighting.

    Is it worth getting a full alarm system for a regular apartment? For gated communities with existing security, a full system might be overkill. Standalone door sensors and a good lock often cover most of the actual risk.

    What time of day do most break-ins happen? Contrary to the movie version, a large share happen during daytime hours when homes are more likely to be empty, not in the middle of the night.

    Should I change my locks after moving into a new home? Yes, always. You have no way of knowing how many spare keys exist from previous residents, contractors, or agents.

    Final Thoughts

    Preventing a break-in isn’t about spending lakhs on security tech. It’s about closing the small, boring gaps — the back door that doesn’t lock properly, the spare key under the mat, the two weeks of drawn curtains during a trip. Layer in a couple of the best smart locks 2026 has available, add motion lighting, and build habits that don’t rely on memory.

    Walk through your own home this week like a burglar would. Check every door, every window, every dark corner. You’ll probably find at least one gap you’ve been ignoring — fix that one first.