Author: shrwanswami@gmail.com

  • Guest Posting for Home Improvement Professionals: A Practical Guide

    When you’re planning a kitchen remodel or trying to fix a persistent damp patch, a clear, practical article from a local builder can be more useful than another glossy project photo. Guest posting gives construction and home professionals a way to share that kind of advice on websites their potential clients already read. Done well, it helps readers make better decisions first; visibility for the business comes second.

    What Guest Posting Means for a Home Business

    Guest posting is writing an article for a website other than your own. A contractor might explain how to prepare a home for monsoon rains, while an architect could discuss what to check before removing an interior wall. The host website gets useful content, and the contributor introduces their experience to a relevant audience.

    It isn’t simply placing a business name or link in as many articles as possible. Readers can tell when an article is thin or written only to promote a service. The strongest contributions answer a real question, offer specific guidance, and are transparent about where professional advice is needed.

    Choose a Topic Homeowners Actually Need

    Start with questions clients ask before a project begins. These usually make better articles than broad topics like “the future of construction.” Think about a decision that can affect safety, cost, comfort, or maintenance.

    • What should homeowners inspect before hiring a roof repair contractor?
    • Which renovation costs are easy to overlook when setting a budget?
    • How can you tell whether a wall is structural before planning a change?
    • What maintenance helps prevent leaks around windows and balconies?
    • What should buyers check during a home viewing beyond the paint and finishes?

    Keep the advice within your experience. A plumber can explain warning signs of a leak, for example, but shouldn’t present a quick visual check as a substitute for investigating hidden water damage. A useful article tells readers what they can reasonably assess themselves and when to call a qualified professional.

    Find a Website That Fits the Subject

    Look for publications whose readers are likely to care about the topic: home design sites, local property publications, renovation blogs, or community websites. Check several recent posts before pitching. Are they practical and detailed? Do they cover the same region or type of home you understand? Is the writing aimed at homeowners, landlords, or trade professionals?

    A good fit matters more than a large audience number. Advice about maintaining a coastal home may not suit a site focused on apartment interiors, even if that site gets more visits. Read the contributor guidelines, too. Some publishers specify word counts, preferred formats, or subjects they don’t accept. A step-by-step guest posting guide can help you plan the process from choosing a site to preparing a pitch.

    Pitch One Clear Idea

    Editors receive plenty of vague messages promising “a great article.” Make your pitch specific and brief. Introduce your relevant experience, suggest a working title, and explain what readers will learn. If you have a practical example from a completed project, describe it without sharing a client’s personal details or implying that one case applies to every home.

    For instance, a renovation professional could propose an article about planning a bathroom update in an older apartment, covering ventilation, waterproofing, and the importance of checking existing plumbing before choosing fixtures. That gives the editor a clear sense of the article’s usefulness and scope.

    Write for the Reader, Not for a Link

    Once an idea is accepted, outline the article around the homeowner’s problem. Explain unfamiliar terms, separate low-risk checks from work that requires a professional, and avoid making sweeping promises about price or results. Costs and building requirements vary by location, materials, and the condition of the property, so give context rather than pretending there’s one universal answer.

    Keep any reference to your business relevant and modest. A short author biography may be appropriate, but the article itself should stand on its own. If you need help with drafting or editing, a freelancer marketplace such as Osdire can connect buyers with freelancers across categories including writing and translation. Compare a writer’s experience and agree on the scope before work begins; a low quote doesn’t guarantee that someone understands construction terminology.

    Review Carefully Before Sending

    Home advice can affect people’s safety and property, so accuracy matters. Check technical claims, measurements, and any references to local permits or building rules. If a point depends on local codes, say so rather than treating it as universal. Remove client names, addresses, photos, or project details unless you have permission to share them.

    Read the draft aloud, too. If a sentence is hard to follow, a homeowner will probably find it hard to use. Break up long explanations, use descriptive subheadings, and make the next step clear without turning the piece into a sales pitch.

    FAQs About Guest Posting for Home Professionals

    Does guest posting guarantee new clients?

    No. It can introduce your expertise to new readers, but results depend on the subject, publication, and quality of the article. Treat it as a way to build useful visibility, not a guaranteed source of leads.

    Should every guest article include a link to my business?

    Follow the host website’s rules. Some allow a brief author bio, while others restrict promotional links. The article should remain useful even if no business link is included.

    How often should I contribute?

    Choose a pace you can maintain without sacrificing accuracy or your day-to-day work. One carefully prepared article is more valuable to readers than several rushed pieces.

    Final Thoughts

    Guest posting works best when a home professional shares knowledge that helps people make informed choices about their property. Choose a relevant publication, pitch a focused idea, and write with care about safety, costs, and the limits of general advice. If readers finish with a clearer idea of what to ask or inspect, the article has done its job.


  • Biophilic Design Ideas: Bringing Nature Into Your Home

    Biophilic Design Ideas: Bringing Nature Into Your Home

    Ever walked into a house and just felt… better? Not because it was fancy, but because it had plants everywhere, sunlight pouring in, and wood that actually looked like wood. That’s biophilic design doing its quiet work. In 2026, more homeowners across India are moving away from cold, all-marble interiors and asking for spaces that breathe. This isn’t a trend that’s going away — it’s how our brains are wired. We’re drawn to nature, even indoors, and biophilic design ideas are simply about honoring that.

    What Is Biophilic Design, Really?

    Biophilic design means shaping your home around natural elements — light, air, plants, water, natural materials — rather than fighting against them.

    Here’s the quick version: it’s the practice of connecting people to nature through the built environment, using elements like sunlight, greenery, natural textures, and airflow so a space feels alive instead of sterile.

    I’ll be honest, when I first heard the term I thought it was just “add a few plants and call it a day.” It’s a bit deeper than that. It’s about how a room makes you feel when you walk in tired after work.

    Start With Natural Light, Not Plants

    Most people jump straight to buying a fiddle leaf fig. Wrong starting point.

    Light comes first. A dim room with ten plants still feels heavy. Before you buy anything, look at where the sun actually hits your home during the day.

    • Pull back heavy curtains and swap them for sheer linen ones
    • Use mirrors opposite windows to bounce light deeper into the room
    • If you’re renovating, consider larger windows or a skylight in the kitchen

    A friend of mine in Jaipur redid her living room last year — she didn’t touch the furniture, just replaced thick maroon drapes with white cotton ones. The room looked twice as big. Sometimes the fix really is that simple.

    Bring In Real Wood and Stone

    Laminate can only fake wood grain so well. There’s a warmth to real timber that plastic just doesn’t have, and you can feel the difference even if you can’t explain why.

    Try mixing in:

    • A reclaimed wood console table or coffee table
    • Stone or terracotta planters instead of plastic ones
    • Cane or rattan furniture, which is having a real moment right now
    • Exposed brick or a lime-plaster wall finish, popular in a lot of Jaipur havelis

    You don’t need to gut your home to do this. Even one accent wall in exposed brick changes the whole mood of a room.

    Choose Plants That Actually Survive Indoors

    This is where most people give up on biophilic design — they buy plants that die within a month, get discouraged, and stop trying.

    Pick plants suited to your actual light conditions, not what looked nice on Instagram. Snake plants, money plants, and ZZ plants tolerate low light and irregular watering, making them ideal for Indian apartments with limited direct sun.

    Some low-maintenance options worth trying:

    • Money plant (Pothos) — near indestructible, grows in water too
    • Snake plant — survives weeks of neglect
    • Areca palm — great for slightly brighter corners
    • Peace lily — flowers indoors and tells you when it’s thirsty by drooping

    I’ve killed more basil plants than I’d like to admit, but the snake plant on my windowsill has outlived three phones.

    Style Bookshelves and Open Shelving the Biophilic Way

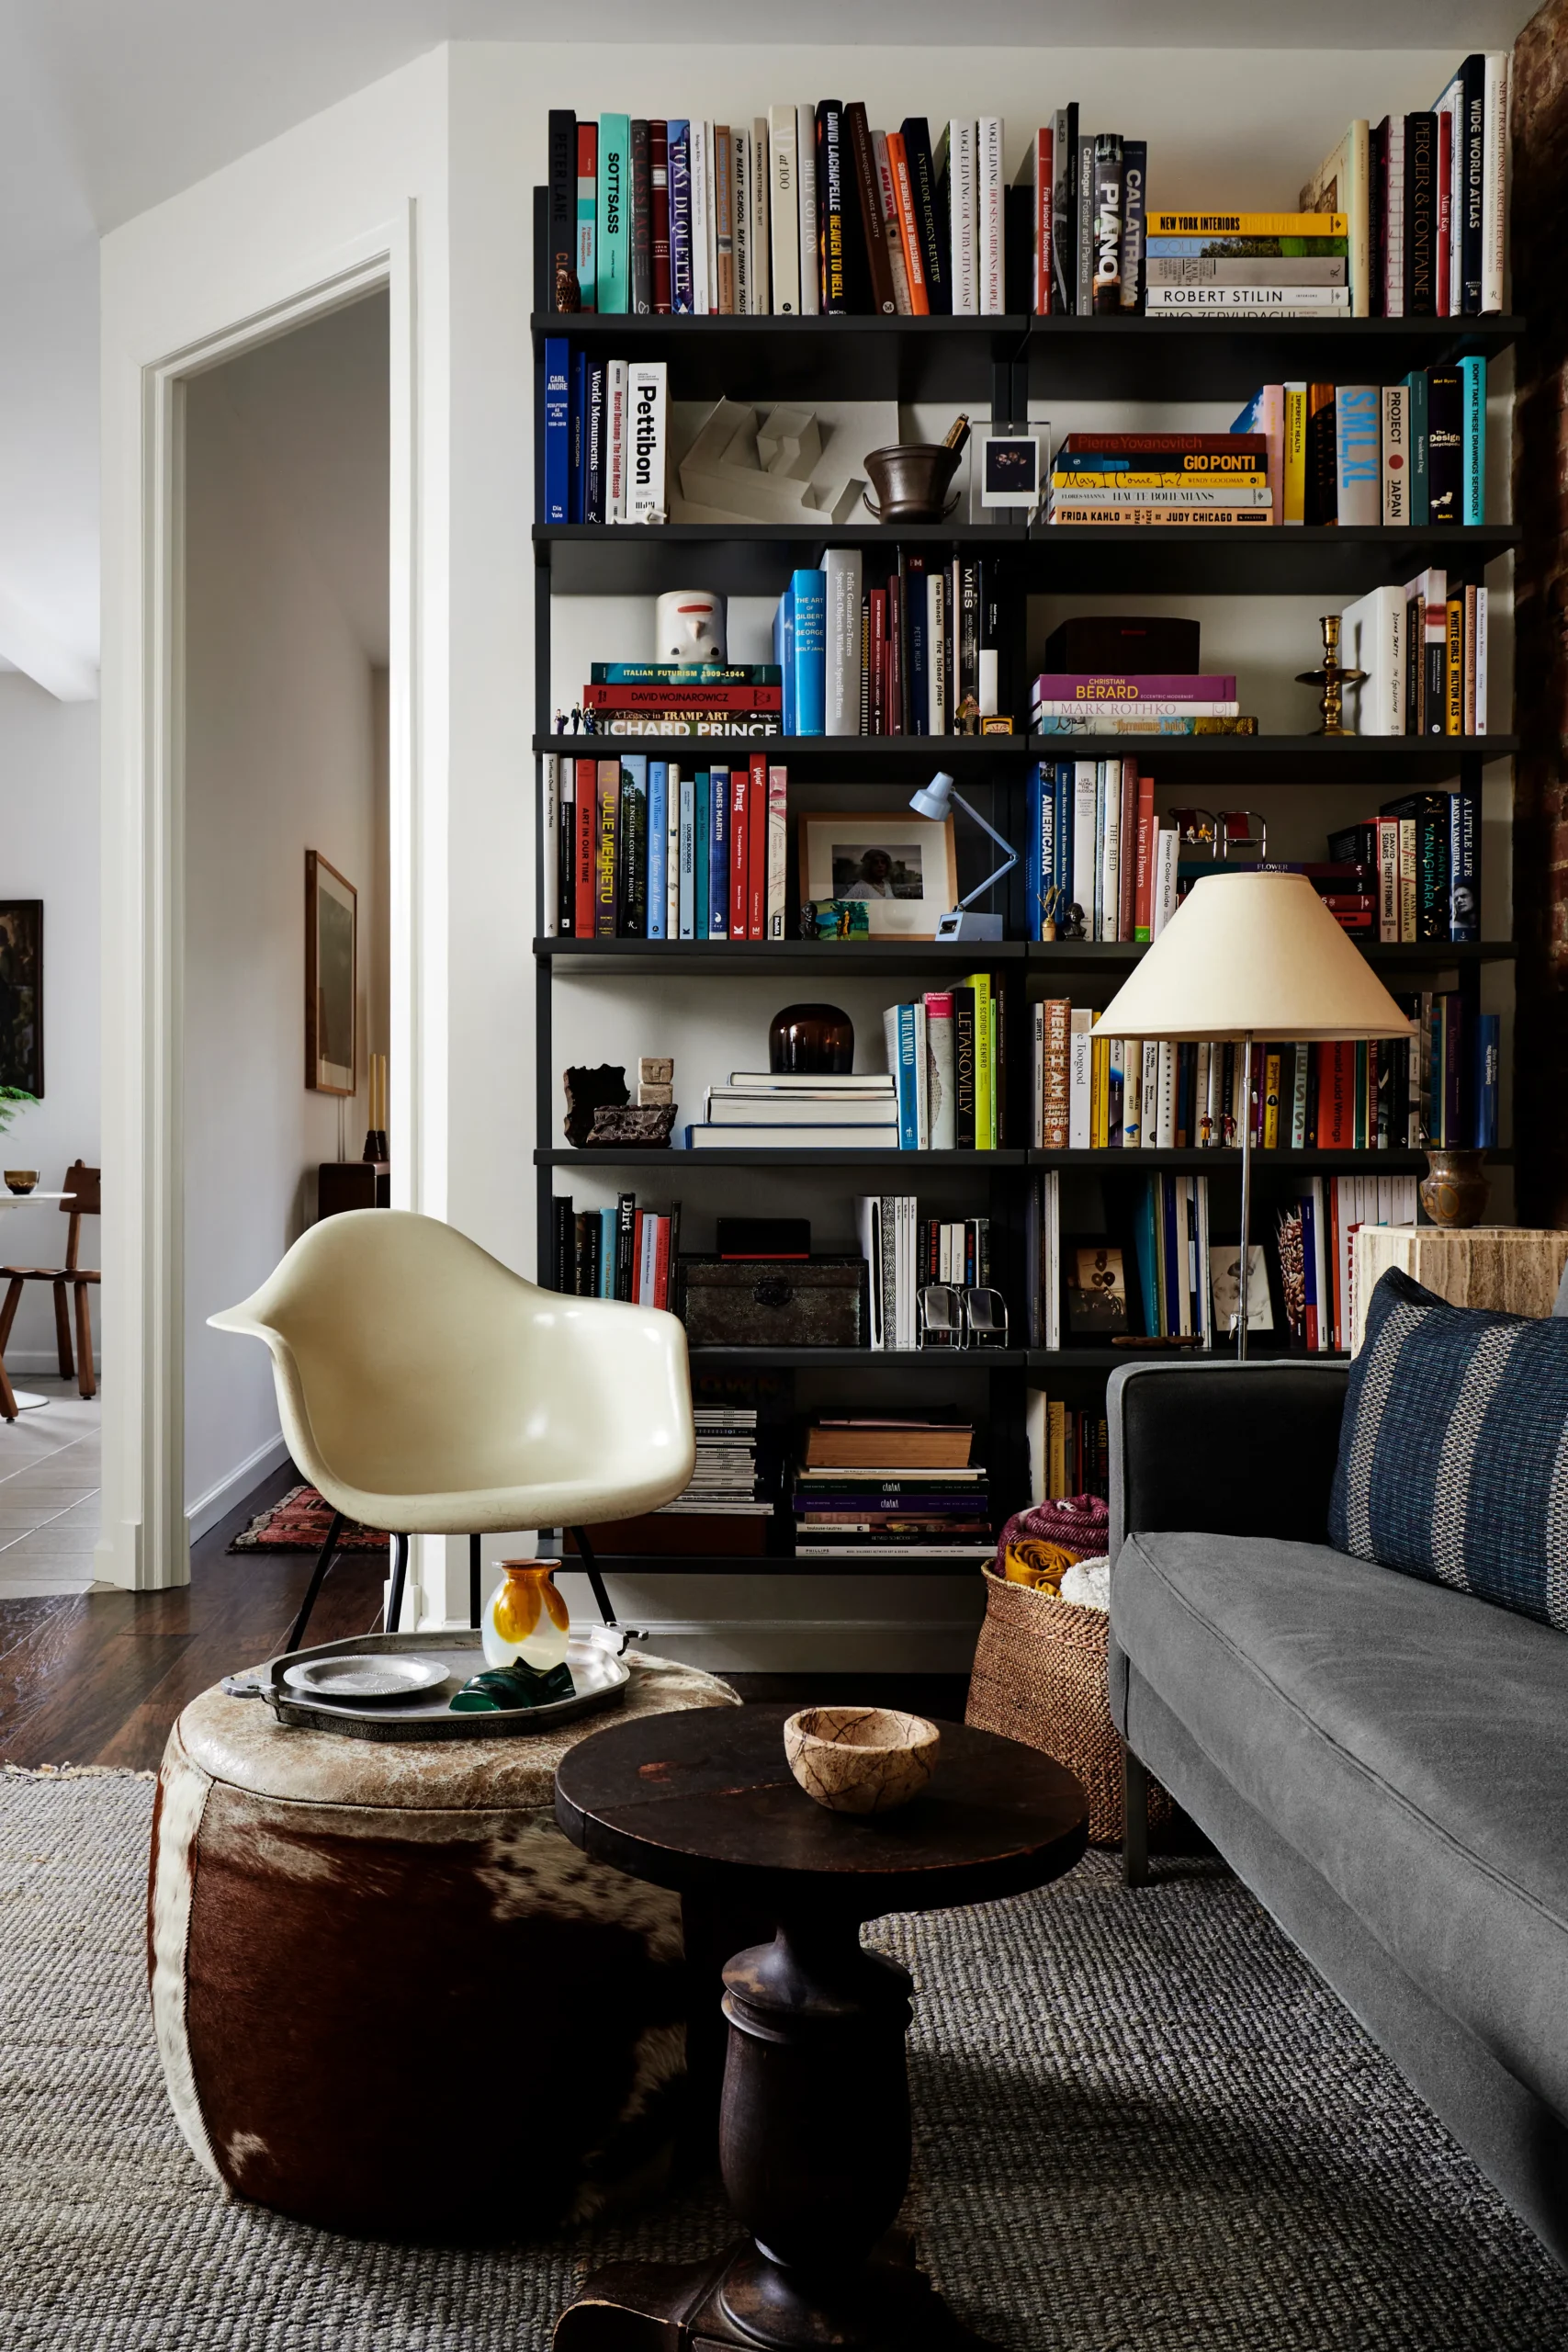
    Your bookshelf doesn’t have to be a wall of spines and clutter. Treat it as a small landscape.

    Group items in threes, mix heights, and leave breathing room — this alone makes shelves feel curated rather than crammed. Layer in a trailing plant, a woven basket, and a stack of books lying flat under one standing upright.

    A few things that work well:

    • Trailing pothos on the top shelf, letting vines hang down naturally
    • A ceramic bowl with dried eucalyptus or pampas grass
    • Natural-fibre baskets for hiding remote controls and cables
    • One or two framed prints of landscapes, not abstract art, if you want the nature theme consistent

    Don’t overthink symmetry here. Real shelves look a little lived-in, not staged for a magazine.

    Add the Sound and Smell of Nature

    We forget that biophilic design isn’t only visual. A small tabletop fountain, wind chimes near a balcony, or simply keeping a window cracked open changes how a room feels within minutes.

    Scent matters too — citrus, sandalwood, or fresh cut flowers do more for “natural ambience” than any diffuser with a synthetic fragrance name.

    Use Natural, Earthy Colour Palettes

    Skip the stark white-and-grey combo everyone’s tired of. Warm terracotta, sage green, sandy beige, and clay tones mimic the outdoors and pair beautifully with wood and greenery.

    Don’t Forget Airflow and Ventilation

    A room can look perfectly styled and still feel stuffy. Cross-ventilation, ceiling fans over air conditioning where possible, and cracking a window each morning does more for wellbeing than another decorative object ever will.

    [link to related guide about choosing indoor plants for low-light homes here]

    [link to related guide about small apartment renovation ideas here]

    FAQs on Biophilic Design

    Is biophilic design expensive to do in an Indian home? Not really. You can start with curtains, a couple of plants, and rearranging what you already own. The costly version involves structural changes like skylights, but that’s optional, not required.

    What’s the easiest biophilic design idea to try this weekend? Swap heavy curtains for lighter ones and add one plant near your main window. Small change, noticeable difference.

    Can biophilic design work in a rented flat? Yes. Plants, shelving, rugs, and lighting are all reversible changes that don’t need landlord approval in most cases.

    Do I need a green thumb for this to work? No. Snake plants and pothos are nearly impossible to kill and still give you that natural, living feel.

    How is biophilic design different from just “adding plants”? Plants are one piece. Light, natural materials, airflow, and even sound all play a part — it’s a whole-home approach, not a single decoration trick.

    [link to related guide about styling small living rooms here]

    Final Thoughts

    Biophilic design ideas don’t need a big budget or a full renovation. Start small — better light, one real-wood piece, a plant that won’t die on you — and build from there. Your home should feel like somewhere you actually want to sit down and breathe, not a showroom. Pick one idea from this list and try it this weekend. See how the room feels afterward. Chances are, you won’t want to stop there.

  • Multi Functional Room Design Ideas for Small Homes

    Multi Functional Room Design Ideas for Small Homes

    Living in a 2BHK in a city like Mumbai or Bengaluru, you already know the struggle. One room has to be a bedroom, a study, sometimes even a gym corner. That’s exactly where multi functional room design comes in — it’s not a luxury concept, it’s survival for anyone paying city rent in 2026. The good news? You don’t need a bigger flat, you need a smarter layout. A few clever furniture choices and some honest planning can make a 250 sq ft room feel like it’s doing the job of three.

    What Does Multi Functional Room Design Actually Mean?

    Multi functional room design is the practice of planning one space to serve two or more purposes without those purposes tripping over each other.

    Think of it as zoning without walls. A bed that becomes a sofa by day. A dining table that folds flat against the wall when guests aren’t over. The goal isn’t cramming furniture in — it’s making sure each piece earns its place.

    Start By Listing What the Room Actually Needs to Do

    Before buying anything, sit down and write out every function that room has to serve. Sounds basic, but most people skip this step and regret it later.

    Ask yourself:

    • Does this room need to sleep someone every night, or only occasionally?
    • Will you be taking video calls from here?
    • Do you need floor space for yoga or exercise, even twice a week?
    • Is storage the real bottleneck, more than square footage?

    I’ve noticed that people usually overestimate how much “flexible” space they need and underestimate storage. A room that looks empty and airy in a showroom photo rarely stays that way once real life — laundry, files, kids’ toys — moves in.

    Furniture That Does Double Duty

    This is the heart of any multi functional room design, honestly. Pick pieces that shape-shift instead of buying separate furniture for every use.

    A murphy bed, a sofa-cum-bed, or an extendable dining table can each replace two or three separate furniture pieces, cutting both cost and clutter in a small room.

    Some combinations that actually work in Indian homes:

    • Sofa-cum-bed for a living room that turns into a guest room overnight
    • Ottoman with storage inside — doubles as seating and hides blankets
    • Wall-mounted folding desk that disappears when you’re not working
    • Bed with drawers built into the base instead of a separate almirah

    A friend running a small tailoring business from her Jaipur home converted one corner of her bedroom into a workstation using exactly this — a fold-down desk and a stool that tucks under it. Took her under ₹8,000 and a weekend.

    Use Vertical Space Before You Give Up on Floor Space

    Most small rooms fail not because they’re too small, but because everything’s fighting for the same six inches of floor.

    Go up. Wall-mounted shelves, tall narrow bookcases, and loft storage above wardrobes free up the floor for whatever the room needs that day. A 9×10 room with proper vertical storage can genuinely function like a 12×12 one.

    Zoning Without Building Walls

    You don’t need to break out the contractor to divide one room into two feels.

    • A rug can visually separate a “work zone” from a “sleep zone”
    • Open shelving units work as room dividers and storage at once [link to related guide about styling bookshelves and open shelving here]
    • Curtains on a ceiling track are cheaper than a partition wall and fully reversible if you’re renting

    Lighting Changes How “Multi” the Room Feels

    One overhead tube light makes every activity feel the same — flat and tiring by evening. Layer your lighting instead: a desk lamp for work, warmer bulbs near the bed, maybe a floor lamp near the seating corner.

    This alone changes how a room “switches” between functions, even if the furniture hasn’t moved an inch.

    Colour and Visual Tricks for Small Multi-Use Rooms

    Lighter walls bounce more light around, which matters more in a multi-use room than a single-purpose one — you’re in there longer, doing more things. Mirrors opposite windows help too. [link to related guide about small apartment renovation ideas here]

    I’ll admit, I used to think this was decorating fluff. Then I repainted a dark green home office wall to a soft off-white and the room genuinely felt 20% bigger. No furniture moved.

    Budget Considerations for Indian Homes

    You don’t need a full renovation. A decent fold-down desk starts around ₹4,000-6,000, and a good sofa-cum-bed can run anywhere from ₹15,000 to ₹40,000 depending on material. Compare that to adding an actual room, and the math isn’t close.

    FAQs on Multi Functional Room Design

    What’s the cheapest way to start with multi functional room design? Rearranging what you already own, honestly. Try a rug to zone the space and a foldable table before spending on new furniture.

    Can a small bedroom really double as a home office? Yes, if you keep the desk compact and against a wall, and use a chair that tucks in fully when not in use. A corner desk works especially well for this.

    Is a murphy bed worth it for Indian apartments? For 1BHK flats, often yes. It frees up the whole floor during the day, though installation and cost can be higher than a regular bed — budget accordingly.

    How do I stop a multi-use room from feeling cluttered? Storage that’s built into furniture, not added on top of it. An ottoman or bed with drawers hides more than an extra shelf ever will.

    Does multi functional room design work for rented flats? Mostly yes — furniture-based solutions like folding desks, curtains, and rugs don’t need landlord approval, unlike wall-mounted shelving which sometimes does.

    Final Thoughts

    Multi functional room design isn’t about squeezing more stuff into less space — it’s about making each piece of furniture work harder. Start with what the room genuinely needs to do, pick furniture that shifts between roles, and use light and colour to help the space feel like it’s changing even when it’s not. Try converting just one corner this month — a desk nook, a fold-out bed — and see how much breathing room it actually creates.

  • How to Style Bookshelves So They Don’t Look Cluttered

    How to Style Bookshelves So They Don’t Look Cluttered

    Stand in front of your bookshelf right now. Be honest — does it look intentional, or does it look like a place things end up when you don’t know where else to put them? Most of us are guilty of the second one.

    Learning how to style bookshelves properly isn’t about owning fancy decor pieces. It’s about a handful of simple rules — spacing, grouping, and a bit of restraint — that turn a shelf full of random stuff into something people actually stop and look at. I redid mine last year after getting genuinely tired of it looking like a storage unit, and the difference took maybe two hours.

    Let’s break down exactly how to do it, section by section.

    Why Most Bookshelves End Up Looking Messy

    The short answer: everything is fighting for attention. Books packed spine-to-spine with no breaks, random knick-knacks squeezed into leftover gaps, nothing grouped by color or height — it’s visual noise, not decor.

    Once you understand how to style bookshelves, you’ll notice the same pattern in almost every well-designed room online: negative space. Empty space isn’t wasted space on a shelf — it’s what makes everything else look deliberate.

    Start by Editing Before You Decorate

    Here’s the part everyone skips, and honestly, it’s the most important one. You can’t style a shelf that’s overflowing. Before you touch decor items, pull everything off and sort it into three piles.

    • Keep on the shelf (books you actually reference or love, plus a few decor pieces)
    • Store elsewhere (books you’re keeping but don’t need on display)
    • Donate or sell (be ruthless here — that college textbook isn’t coming back)

    A shelf styled with 60% of its original content almost always looks better than the same shelf with everything crammed in. Less genuinely is more here, even if it feels wasteful to hide half your books away.

    The 70-30 Fill Rule

    Aim to fill roughly 70% of the shelf space and leave 30% open. A completely packed shelf reads as storage; a shelf with breathing room reads as design.

    Group Books By Color, Not Just Height

    This is probably the single biggest shift people notice. Grouping by color creates a visual rhythm that grouping by size or genre just doesn’t.

    Try this approach:

    1. Sort your books into rough color families (warm tones, cool tones, neutrals, black/white)
    2. Place the darkest colors toward the bottom shelves — it grounds the whole unit visually
    3. Let lighter colors and neutrals sit higher up

    I’ll admit, some people hate this method because it makes finding a specific book by title annoying. Fair point. If you actually use your shelf as a working library, group by genre instead and just keep spacing tight and even. Function matters more than looking pretty for a photo.

    Mix Vertical and Horizontal Stacking

    Books stacked flat, lying on their sides, give your eye a place to rest between all the upright spines. It also gives you a surface to prop small decor items on top of.

    A good ratio: about 2 vertical rows of books for every 1 horizontal stack, per shelf. Too many horizontal stacks and the whole thing starts to look unstable and messy rather than curated.

    Use the Rule of Three (and Sometimes Break It)

    Grouping decor items in threes is such a well-worn design rule it’s almost a cliché at this point — but it works because odd numbers create visual movement that pairs just don’t.

    A classic three-item shelf grouping might look like:

    • A stack of 3-4 horizontal books
    • One taller object (a vase, a small sculpture, a framed photo standing up)
    • One low, wide object (a small bowl, a candle, a smooth stone)

    Picture a Bengaluru apartment owner setting up a small home office nook. Instead of buying a full matching decor set for ₹15,000, they used what they already had — an old brass diya, a stack of paperbacks, and a single potted pothos — arranged in threes across two shelves. The whole nook cost them under ₹500 in a new plant and looked more put-together than half the styled shelves online.

    Bring in Plants for Life and Texture

    Plants soften a shelf full of hard edges — books, frames, ceramics — instantly.

    A trailing plant like pothos or a string of hearts works especially well on upper shelves, where it can spill down naturally over the edge. On lower shelves, something more compact like a snake plant or a small succulent holds its shape better and needs less fuss. Either way, one plant per two to three shelves is usually enough — more than that and it starts competing with everything else.

    Vary the Heights, Deliberately

    Nothing kills a shelf’s visual interest like everything sitting at the same height. Your eye needs some rise and fall to actually register the arrangement as designed rather than just placed.

    A quick trick: use books themselves as risers under smaller objects. A short stack under a small frame or vase instantly adds height variation without buying a single new prop.

    [link to related guide on vintage home decor ideas here]

    Common Mistakes That Ruin an Otherwise Good Shelf

    I’ve made most of these myself over the years, so this list comes from experience, not just theory.

    • Overcrowding every single shelf equally instead of varying the density
    • Using decor items that are too small — they get visually lost next to books
    • Ignoring the backboard of the shelf (a coat of paint or wallpaper behind open shelving adds a lot for very little effort)
    • Matching every object’s color to the wall — it flattens the whole display instead of making it pop

    [link to related guide on small space storage solutions here]


    FAQs About How to Style Bookshelves

    How many books should be on a styled shelf? Roughly 60-70% of the shelf’s total capacity works best visually. A fully packed shelf reads as storage, not decor, so leaving deliberate gaps actually makes the display look more intentional.

    Should I organize books by color or by author/genre? Depends on your priority. Color grouping looks more visually striking for open display shelves, but if you actually use the shelf to find books quickly, genre or author order will serve you better day to day.

    What decor items work best on bookshelves besides books? Small plants, framed photos, ceramic bowls, candles, and one or two taller sculptural objects tend to work well. Keep the total number of non-book items modest — three to five per shelf is usually plenty.

    How do I style a bookshelf on a tight budget? Use what you already own first. Old jars, plants from cuttings, and books you already have, stacked and rearranged thoughtfully, cost nothing and usually look better than a shelf full of newly bought matching decor.

    Do open shelves need a backboard or backing? Not strictly, but it helps a lot. A painted or papered backboard adds contrast and makes the objects on the shelf stand out far more than a plain wall behind it.

    How often should I restyle my bookshelf? There’s no fixed rule, but swapping a few items seasonally, or whenever you get bored of the look, keeps it feeling current without needing a full redo each time.


    Final Thoughts

    Getting how to style bookshelves right really comes down to three things: edit ruthlessly, group with intention, and leave some empty space to let it all breathe. None of it requires a big shopping trip — most of the improvement comes from rearranging what you already own.

    Pick just one shelf today. Pull everything off, sort it by the three-pile method above, and put back only what earns its spot. Give it ten minutes before you decide it needs new decor — chances are, you’ll be surprised how much better it looks with just what you had all along.

  • Vintage Home Decor Ideas for a Timeless, Lived-In Look

    Vintage Home Decor Ideas for a Timeless, Lived-In Look

    Ever walked into someone’s home and felt like it had a story to tell? That’s usually not an accident. Good vintage home decor ideas aren’t about stuffing a room with antiques — they’re about picking pieces that feel like they’ve earned their spot. I’ve redone two rooms in my own house this way, and honestly, it’s the compliments-per-rupee-spent ratio that sold me on it.

    This isn’t a guide to turning your living room into a museum. It’s about blending old and new so the space feels warm, a little imperfect, and genuinely yours. Let’s get into it.

    What Makes Vintage Home Decor Ideas Work in a Modern Home?

    The best vintage home decor ideas balance restraint with character — one or two standout old pieces per room, paired with simple modern furniture, so the space feels curated rather than cluttered or theatrical.

    Here’s the thing most people get wrong: they think “vintage” means everything old. It doesn’t. A single 1970s brass lamp on a plain modern side table does more for a room than five mismatched antiques crammed onto one shelf. Restraint is basically the whole trick.

    Start With One Statement Piece, Not a Whole Room

    Trying to overhaul an entire room in one go usually backfires — you end up with a set that looks staged, like a furniture showroom rather than someone’s actual home.

    Instead, pick one piece to build around:

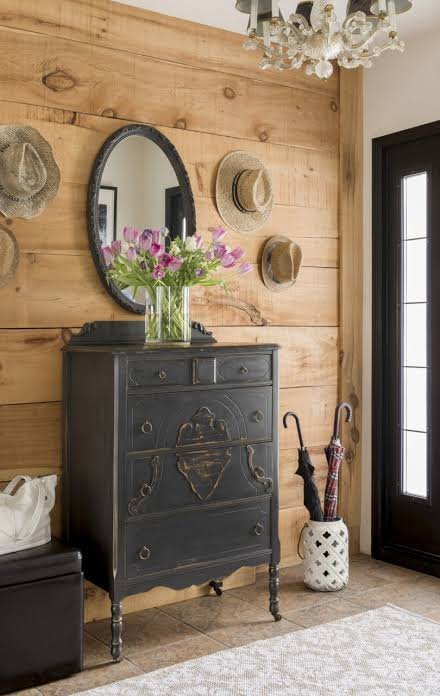
    • An old wooden almirah with peeling paint (don’t refinish it completely — that patina is doing half the work)
    • A brass or copper water pot repurposed as a planter
    • A carved wooden door panel mounted as wall art
    • A cane or rattan chair with a slightly worn seat

    Pick something with a bit of visible age. New furniture “distressed” to look old rarely fools anyone, and honestly, it usually looks worse than the real thing.

    Mixing Eras Without It Looking Like a Garage Sale

    I’ll be honest — this is the part people struggle with most. You’ve got a grandmother’s teak dresser, an IKEA sofa, and a set of steel-framed chairs from a local carpenter, and somehow it needs to look intentional.

    The trick that’s worked for me: pick one material or color to repeat across old and new pieces. If your vintage dresser is teak, echo that warm brown tone somewhere else in the room — a cane basket, a jute rug, even curtain rods. Your eye follows the repetition and reads the whole room as “put together,” even when the furniture spans three decades.

    Try the 70-30 Rule

    Aim for roughly 70% newer, simpler pieces and 30% genuine vintage. Go the other way and the room can start to feel heavy, almost like storage rather than living space.

    Where to Actually Find Good Vintage Pieces in India

    Chor Bazaar in Mumbai gets all the attention, but honestly, some of my best finds have come from smaller, less Instagram-famous places.

    A few worth checking:

    • Local raddiwalas — the scrap dealers who sometimes sit on genuinely old furniture
    • Sunday flea markets (most tier-1 and tier-2 cities have at least one now)
    • Family members who are “modernizing” and want to get rid of old furniture — ask before it hits the scrap dealer
    • Old furniture restoration shops, which often have a back room of unsold or unclaimed pieces

    Picture a young couple setting up their first flat in Jaipur on a tight budget. Instead of buying a full new furniture set for around ₹80,000, they picked up a used teak dining table for ₹6,000 from a relocating family, had it sanded and oiled for another ₹1,500, and paired it with basic new chairs. The table became the room’s whole personality. That’s the move.

    Color Palettes That Read as Vintage, Not Dated

    Skip the trap of assuming vintage means beige and brown everywhere. Muted, slightly dusty tones work better than either bright modern colors or heavy dark ones.

    Colors that tend to work well:

    • Sage green
    • Terracotta and rust
    • Faded mustard
    • Dusty rose
    • Warm ivory (not stark white — it fights with aged wood tones)

    Vintage home decor ideas lean heavily on these earthy, slightly faded shades because they don’t compete with the natural aging in wood, brass, and fabric — they complement it.

    Fabrics and Textiles Matter More Than People Think

    A room can have all the right furniture and still feel flat if the textiles are wrong. Old cotton dhurries, hand-block-printed bedspreads, or a faded kantha throw add texture that new fabric just can’t fake.

    If you can get your hands on old saris — your mother’s or grandmother’s — consider having them turned into cushion covers or a small wall hanging. It’s cheap, sentimental, and instantly makes a room feel less generic.

    Lighting Is the Most Underrated Vintage Detail

    Most people spend all their budget on furniture and completely forget lighting, which is a shame because a warm-toned bulb in an old brass fixture does more heavy lifting than another decor object ever will.

    Swap harsh white LED bulbs for warm (2700K) ones in at least the living and bedroom areas. Old-style Edison bulbs with visible filaments, hung bare or in a simple metal cage, instantly read as vintage without you buying a single antique.

    Small Details That Tie It All Together

    Vintage home decor ideas often come down to the small stuff nobody notices consciously but everyone feels:

    1. Mismatched but coordinated door and window handles in brass or iron
    2. Glass bottles or old medicine jars repurposed as vases
    3. A worn leather-bound book stack used as a side table riser
    4. Hand-painted ceramic tiles inset into a plain shelf

    None of these cost much. That’s kind of the point — you don’t need a big budget to get a timeless home decor look, just a good eye and some patience.

    [link to related guide on budget home renovation ideas here]

    Common Mistakes to Avoid

    I’ve made a couple of these myself, so take it from someone who’s learned the hard way:

    • Over-restoring pieces until they lose all their original character
    • Mixing too many wood tones without any unifying color or texture
    • Going full vintage in every single room (it gets exhausting, and expensive)
    • Ignoring scale — a huge antique cupboard in a small flat will dominate the room instead of complementing it

    [link to related guide on small space furniture ideas here]


    FAQs About Vintage Home Decor Ideas

    Is vintage decor expensive to achieve? Not really. Some of the best pieces come from flea markets, family hand-me-downs, or local scrap dealers, often for a fraction of new furniture prices. The expense usually comes from buying “vintage-style” new furniture instead of the real, aged thing.

    How do I make vintage furniture look clean, not old and worn? A light sanding, a coat of natural oil or wax, and reupholstering fabric seats usually does the job. Avoid stripping and repainting completely — you’ll lose the character that makes it vintage in the first place.

    Can I mix vintage decor with a modern minimalist home? Yes, and honestly it often looks better than an all-vintage room. One or two standout antique pieces against a clean, neutral modern backdrop tends to look more curated than either style alone.

    [link to related guide on modern minimalist interiors here]

    What’s the difference between vintage and antique furniture? Generally, antique means 100+ years old, while vintage covers roughly 20 to 99 years old. For decor purposes, most people use “vintage” loosely to mean anything with an older, aged aesthetic.

    Do I need matching furniture for a vintage look? No — matching sets actually work against the vintage aesthetic. The charm comes from pieces that look collected over time, not bought together in one showroom trip.

    Where should I start if I’m on a tight budget? Start with lighting and one statement piece, like an old cupboard or table. These two changes alone shift how a room feels more than a dozen small decor items would.


    Final Thoughts

    Getting vintage home decor ideas to actually work in your home isn’t about spending big or hunting down rare antiques. It’s one good piece, a repeated color or material, warmer lighting, and the patience to let a room build its character over time rather than all at once.

    Start small. Pick one corner of your home — maybe just a reading nook or an entryway table — and try one idea from this list this month. See how it feels before you commit to redoing an entire room. Chances are, that one small change will tell you exactly which direction to take the rest of your home.

  • Paint Finishes Explained: Matte, Satin, Gloss, and More

    Paint Finishes Explained: Matte, Satin, Gloss, and More

    So you’ve picked your wall color. Great. Now the guy at the paint shop asks, “Matte, satin, ya gloss chahiye?” and suddenly you’re stuck.

    Here’s the thing — most people obsess over color and completely forget that types of paint finishes matter just as much, sometimes more. The wrong finish can make a gorgeous color look cheap, or turn a high-traffic hallway into a scuff-mark disaster within six months. I’ve seen it happen. A friend painted her Jaipur apartment’s living room in a flat matte white because it looked “classy” in the sample — within a year, every handprint near the switchboard was permanently visible.

    This guide breaks down each finish, what it’s actually good for, and where people usually get it wrong.

    What Is a Matte Paint Finish?

    Matte finishes are the least reflective of all paint finishes — almost zero shine, which is exactly why they hide wall imperfections so well.

    If your walls have small dents, patch marks, or uneven plastering (very common in older Indian homes), matte will disguise all of that beautifully. Light just doesn’t bounce off it the way it does with glossier options.

    But there’s a catch. Matte paint is porous. It absorbs stains instead of letting you wipe them off, and scrubbing it too hard can leave a lighter patch behind. That’s not a design opinion, that’s just chemistry.

    Best for:

    • Bedrooms and formal living rooms
    • Ceilings, almost always
    • Low-traffic spaces where hands rarely touch the wall

    Skip it for: kitchens, kids’ rooms, and stair walls. Trust me on this one.

    Eggshell Finish — The Quiet Middle Ground

    Eggshell sits just above matte on the shine scale — think of the soft sheen on an actual eggshell, not shiny, not flat either.

    It’s a decent everyday choice for people who want something a little more washable than matte, without going full satin. Living rooms and dining areas that see moderate foot traffic tend to do well here.

    One thing I’ve noticed: eggshell still shows roller marks more than pure matte does, so application technique matters more than people expect.

    Satin Finish: The Practical All-Rounder

    A satin finish has a soft, pearly glow — visible sheen, but nothing glaring. It’s genuinely one of the most popular of all the paint finishes used in Indian homes right now, and for good reason.

    Why people love satin paint: it balances durability and washability with a look that isn’t shouting “shiny plastic wall” at you. You can wipe off spills, crayon marks, and finger smudges without much drama.

    Picture a small business owner in Jaipur running a home tuition class from her living room. Kids touching walls, bags dragging past corners, the occasional chai spill — satin handles all of it far better than matte would, while still looking soft and elegant.

    Good for:

    1. Kids’ bedrooms
    2. Hallways and staircases
    3. Family rooms with daily wear and tear

    If you’re repainting a rental property between tenants, satin is honestly the safest bet.

    Semi-Gloss: Built for Wear and Tear

    Semi-gloss paint reflects noticeably more light and is tougher, more stain-resistant, and easier to clean than satin. It’s the finish contractors reach for in kitchens, bathrooms, and window trims — anywhere moisture or grease is a regular visitor.

    The tradeoff is visibility. Semi-gloss doesn’t forgive wall flaws the way matte does. Every dent, crack, or uneven patch job shows up under it, so surface prep needs to be near-perfect before you paint.

    Best for: kitchen walls, bathroom trims, door frames, cabinets.

    High Gloss — The Showstopper (Use Sparingly)

    High gloss is the shiniest, hardest-wearing option on the shelf. It looks almost lacquered once it dries. Front doors, railings, and furniture accents often get this treatment because it’s genuinely tough — resists moisture, scuffs, and daily handling better than anything else on this list.

    Would I paint an entire living room wall in high gloss? Honestly, no. It’s a lot. Every bump and brush stroke becomes visible, and on large wall areas it can look almost plasticky rather than premium. Save it for smaller accent surfaces or trim work where its shine actually adds drama instead of overwhelming the room.

    How to Choose Among Types of Paint Finishes by Room

    In short: use matte or eggshell for bedrooms and ceilings, satin for living areas and kids’ rooms, semi-gloss for kitchens and bathrooms, and high gloss only for doors, trims, or accent furniture.

    Here’s a quick room-by-room cheat sheet:

    RoomRecommended Finish
    CeilingMatte
    BedroomMatte / Eggshell
    Living RoomSatin / Eggshell
    Kids’ RoomSatin
    KitchenSemi-Gloss
    BathroomSemi-Gloss
    Doors & TrimSemi-Gloss / High Gloss

    [link to related guide on choosing the right paint color for small rooms here]

    Matte vs Satin vs Gloss: Quick Comparison

    People ask this constantly, so let’s settle it plainly.

    • Matte — hides flaws, low durability, hard to clean
    • Satin — balanced sheen, moderately durable, easy to wipe
    • Semi-gloss — shows flaws, very durable, easy to clean
    • High gloss — maximum shine, maximum durability, shows every imperfection

    None of these is “the best” one overall. It genuinely depends on the wall, the room, and how much abuse that surface takes daily. [link to related guide on interior vs exterior paint types here]

    A Quick Word on Undertones and Lighting

    One thing paint charts never tell you — the same finish can look different depending on your room’s lighting. A satin finish under warm yellow bulbs looks noticeably softer than under cool white LED lights. If you’re unsure, get a small sample tin and test it on the actual wall at different times of day. Don’t just trust the paint shop’s swatch card under their showroom lighting. [link to related guide on testing paint samples before buying here]


    FAQs About Paint Finishes

    1. Which paint finish is best for walls in India’s humid or coastal regions? Semi-gloss or satin generally hold up better in humidity since they resist moisture and mold more than matte does. In places like Mumbai or Kochi, this makes a real difference over a couple of monsoons.

    2. Can I mix two paint finishes in the same room? Yes, and it’s actually pretty common — matte or eggshell on the main walls, semi-gloss on trims and doors. It adds subtle contrast without needing a second color.

    3. Is satin finish washable? Yes, reasonably so. You can wipe off most everyday marks with a damp cloth, though it’s not as tough as semi-gloss.

    4. Does a glossier finish always cost more? Not necessarily — pricing depends more on the brand and paint quality than the sheen level itself. Premium matte paints can cost the same or more than basic semi-gloss ones.

    5. What finish should I use for ceilings? Stick with matte. It hides uneven plastering and doesn’t reflect light in a way that highlights every little flaw overhead.

    6. How do I know if my wall needs a higher-sheen finish? If it’s a high-touch area — kitchen, kids’ room, hallway — go glossier. If it’s rarely touched, like a formal bedroom or ceiling, matte works fine.


    Final Thoughts

    Picking between the different types of paint finishes really comes down to one question: how much wear is this wall going to take? Matte for calm, low-traffic spaces. Satin for the practical middle ground. Semi-gloss and high gloss where durability matters more than subtlety.

    Before your next paint order, walk through your home room by room and think about what actually happens on those walls — kids running past, kitchen splatters, hallway bag-drags. Match the finish to real life, not just to what looks nice on a sample card, and you’ll save yourself a repaint sooner than you’d expect.

  • How to Paint Furniture Like a Professional

    How to Paint Furniture Like a Professional

    You’ve probably tried it before. Grabbed a leftover can of wall paint, slapped it on an old chair, and ended up with drips, brush marks, and a finish that looks… amateur. Sound familiar?

    Learning how to paint furniture properly isn’t complicated, but it does require doing a few boring steps that most people skip. Sanding. Priming. Waiting. The stuff nobody wants to do.

    I’ve refinished maybe a dozen pieces over the years — an old teakwood almirah from my grandmother’s house, a couple of cane chairs, a study table that had seen better days. The difference between a “meh” result and one that actually looks store-bought almost always comes down to prep work, not the paint itself. Let’s get into it.

    Why Most DIY Furniture Paint Jobs Look Amateur

    In short: most furniture paint jobs fail because people skip sanding and priming, rush between coats, or use the wrong paint type for the surface. It’s rarely the color choice that’s the problem.

    Here’s what I mean. Paint doesn’t stick well to a shiny, sealed surface. If your old dining chair had a factory varnish on it, fresh paint will peel off within weeks unless you’ve roughed up that surface first.

    Another common issue — painting in humid weather. In cities like Mumbai during monsoon season, paint takes forever to dry and often stays tacky, attracting dust and lint that ruins the finish.

    Gather the Right Materials First

    Don’t start until you’ve got everything on hand. Running to the hardware store mid-project with wet paint drying on your brush is a special kind of frustrating.

    You’ll typically need:

    • Sandpaper (120-grit for rough surfaces, 220-grit for smoothing)
    • A good quality primer, especially if you’re going from dark wood to light paint
    • Furniture paint or enamel (chalk paint, latex, or oil-based, depending on the look)
    • Angled brush and a small foam roller
    • Painter’s tape, drop cloth, and a tack cloth for dust removal

    A decent 2-inch angled brush from a local hardware store costs around ₹150-250, and honestly, it makes more difference than the paint brand you pick.

    Step 1: Clean and Sand the Surface

    Painting furniture always starts here, not with the paint can.

    Wipe the piece down first — grease, dust, and old wax all interfere with paint adhesion. A damp cloth with mild soap works fine for most wood furniture.

    Then sand. Not to strip the whole piece back to bare wood (unless it’s badly damaged), just enough to dull the shine and give the primer something to grip onto. Run your hand over it afterward — it should feel slightly rough, almost like fine fabric.

    Step 2: Prime Before You Paint

    Skipping primer is probably the single biggest mistake I see people make when figuring out how to paint furniture at home.

    Primer blocks old stains and tannins from bleeding through your topcoat, and it gives the paint something consistent to bond with. Without it, you might need three or four coats of paint just to get even coverage — which wastes both time and money.

    One thin, even coat is usually enough. Let it dry fully, typically 2-4 hours depending on humidity, before moving to the next step.

    Step 3: Choose the Right Paint Type

    This is where a lot of people get stuck, and honestly, there’s no single “correct” answer here.

    • Chalk paint — great for a matte, vintage look; needs a wax or sealant topcoat afterward
    • Enamel paint — tougher, more durable, holds up well on tables and chairs that get daily use
    • Latex/acrylic paint — easy to clean up, dries fast, works well for lighter accent pieces

    I personally lean toward enamel for anything that’ll take daily wear — dining chairs, study tables. Chalk paint looks lovely on display pieces, but I’ve noticed it chips more easily if kids or pets are involved.

    Step 4: Apply Thin, Even Coats

    How to paint furniture the right way basically comes down to patience — thin coats, applied slowly, always beat one thick, rushed coat.

    Load your brush lightly. Drag it in long, even strokes following the wood grain, not back and forth like you’re scrubbing a pan. Thick coats look glossy at first but usually end up with drips, uneven texture, and longer drying times.

    Plan for at least two coats, sometimes three for lighter colors like white or pastel shades over dark wood.

    A few tips that actually help:

    1. Paint in a well-ventilated room, ideally with a fan on low (not pointed directly at the piece — that stirs up dust)
    2. Flip small items like drawers or chair legs so you’re never painting overhead
    3. Sand very lightly between coats with 220-grit paper to knock down any texture

    Step 5: Seal and Protect the Finish

    Once your final coat is dry — give it a full 24 hours, don’t rush this part — a protective topcoat extends the life of your paint job considerably.

    Polyurethane, wax, or a matte varnish all work depending on the look you want. For high-use furniture like dining tables, I’d go with a water-based polyurethane. It’s tougher against spills and scratches than wax alone.

    [link to related guide on choosing the right paint finish for furniture here]

    Common Mistakes to Avoid When Painting Furniture

    Even with the right steps, small errors can undo a good paint job.

    • Painting over dust or pet hair without wiping down first
    • Using a wall paint roller instead of a foam one — leaves an orange-peel texture
    • Not testing the color on a hidden spot first
    • Removing painter’s tape too late, which can peel off dried paint along with it

    Picture a small business owner in Jaipur repainting a set of café chairs for her new shop. She skipped sanding to save time, and within two months, customers’ hands had worn the paint clear off the armrests. A little patience upfront would’ve saved her the redo.

    [link to related guide on prepping wood surfaces before painting here]


    FAQs About Painting Furniture

    1. How long does it take to paint a piece of furniture properly? Including drying time between coats, budget for at least 2 days for a small piece like a chair, and 3-4 days for something larger like a dresser or table.

    2. Can I paint furniture without sanding it first? You can use certain bonding primers that reduce the need for heavy sanding, but a light scuff-sand still helps the paint hold up longer. Skipping it entirely usually shows within a few months.

    3. What’s the best paint for wooden furniture in humid climates? Oil-based enamel or a good quality water-based enamel tends to handle humidity better than chalk paint, which can stay tacky longer in monsoon conditions.

    4. Do I need to remove old paint before repainting furniture? Not always. If the existing paint is in good shape and not peeling, sanding and priming over it usually works fine. Strip it only if it’s flaking or badly damaged.

    5. How many coats of paint does furniture usually need? Most pieces need two coats minimum, sometimes three for lighter colors going over darker wood. Thin coats always look better than trying to cover in one thick layer.

    6. Is spray paint better than brush painting for furniture? Spray paint gives a smoother finish and works well for detailed pieces like cane chairs, but it needs a well-ventilated outdoor space and more prep with masking. Brushes are more practical for most home setups.


    Final Thoughts

    Learning how to paint furniture the right way really comes down to slowing down — clean, sand, prime, then paint in thin, patient coats. Skip any one of those steps and it’ll usually show up within a few months, not right away.

    If you’ve got an old piece sitting around collecting dust, this year’s as good a time as any to give it a second life instead of buying new. Pick one small item first — a stool, a side table — and treat it as practice before tackling anything bigger.

  • How to Fix Squeaky Floorboards Yourself (2026 Guide)

    How to Fix Squeaky Floorboards Yourself (2026 Guide)

    You know the spot. Right outside the bedroom door, or maybe at the top of the stairs — that one board that announces every late-night trip to the kitchen. Learning how to fix squeaky floorboards isn’t complicated, and in most cases you don’t need a carpenter or a full day off work. It usually comes down to loose wood rubbing against a nail, or a subfloor that’s shifted slightly over time.

    I’ve fixed squeaks in three different homes now, and every single time I assumed it’d be a bigger job than it turned out to be. Let’s get into what actually works.

    Why Do Floorboards Squeak in the First Place?

    Direct answer: Floorboards squeak when wood rubs against wood, or wood rubs against a loose nail, usually because of gaps that form as the material dries out and shifts with humidity changes over the years. Temperature swings and foot traffic make this worse over time.

    In Indian homes, especially older ones with wooden flooring in hill stations like Shimla or Ooty, humidity swings between monsoon and winter cause real movement in the wood. That expansion and contraction loosens fasteners bit by bit. It’s not a manufacturing defect most of the time — it’s just wood being wood.

    Concrete subfloors with a wooden overlay can squeak too, usually because the adhesive layer has dried out or wasn’t applied evenly to begin with.

    Locating the Exact Squeak Before You Touch Anything

    Don’t skip this step. Seriously.

    Walk slowly across the area barefoot (you’ll feel more than you think) and mark every spot that creaks with a small piece of chalk or tape. Get someone to walk while you listen from below if you have access to a basement or crawlspace — that’s the fastest way to pinpoint the exact joist.

    A few tips here:

    • Squeaks near walls are usually easier fixes than squeaks in the middle of a room
    • If multiple boards squeak in a line, you’re probably dealing with a joist issue, not individual boards
    • Early morning is a surprisingly good time to check — the house is quiet enough to hear small differences in sound

    Fixing Squeaks From Below (If You Have Access)

    If you can get under the floor — through a basement, crawlspace, or open subfloor — this is honestly the easiest and least invasive method. No need to touch the finished floor at all.

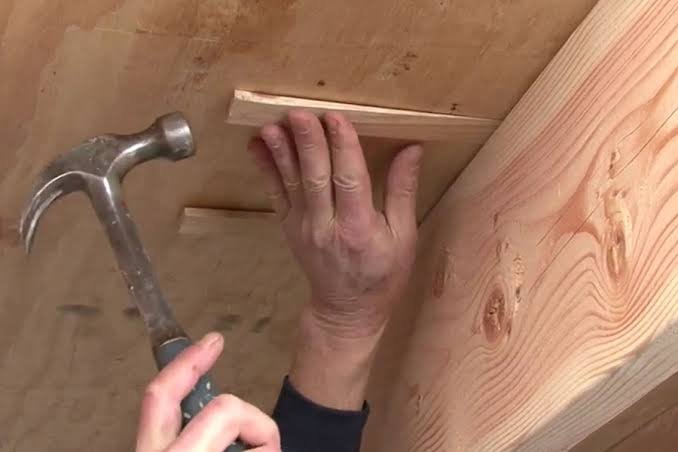
    1. Locate the squeaky spot from above and mark it, then go underneath with a helper coordinating
    2. Look for any gap between the subfloor and the joist — a playing card or thin wood shim slides in here nicely
    3. Use construction adhesive on the shim before inserting it, don’t just wedge it in dry
    4. For bigger gaps, screw a cleat (a small wood block) alongside the joist to add support

    This method works particularly well for older homes with wooden joist construction — think colonial-era bungalows in places like Pune or parts of old Delhi.

    Fixing Squeaks From Above (No Access Below)

    Direct answer: When you can’t reach the subfloor, use specialty screws designed to snap off below the surface, driven through the finished floor into the joist, then fill the small hole with matching wood putty. This method takes under 20 minutes per squeak.

    Most hardware stores in India now stock squeak-repair kits — brands like Bosch and Taparia sell versions of these snap-off screw systems, usually priced between ₹400-900 depending on the kit size.

    Here’s roughly how it goes:

    • Find the joist location using a stud finder (or just tap and listen for the solid sound versus hollow)
    • Drill a pilot hole to avoid splitting the board
    • Drive the screw at a slight angle through the floorboard into the joist
    • Snap off the screw head at the depth line and fill with wood filler

    [link to related guide on choosing the right wood filler here]

    Dealing With Damaged or Warped Boards

    Sometimes it’s not a squeak — it’s actual damage. Cracked boards, water stains, warping near a window where rain’s been getting in. That’s a different problem entirely, and honestly, trying to “fix” a warped board with screws alone rarely works long-term.

    If the damage covers a small area, replacing individual boards is usually more cost-effective than refinishing an entire room. A carpenter in a mid-sized Indian city will typically charge ₹150-350 per board for replacement, materials included, though this varies a lot by wood type.

    Talcum Powder and Other Quick Temporary Fixes

    Not ready for a full repair? Fair enough — sometimes you just need the noise gone before guests arrive.

    Sprinkling talcum powder or powdered graphite between the boards can reduce friction enough to quiet things down for a few weeks. It’s not a permanent fix, more of a band-aid, but it genuinely works in a pinch.

    [link to related article on general home maintenance checklists here]

    When to Call a Professional

    If your entire floor creaks — not just one or two spots — that could point to a structural issue with the joists themselves, and that’s not a DIY weekend project. Sagging floors, visible joist damage, or squeaks that come with a slight bounce underfoot are signs to bring in a structural engineer, not just a handyman.

    [link to guide on identifying structural home issues here]

    FAQ: How to Fix Squeaky Floorboards

    Can I fix squeaky floorboards without removing carpet? Yes, for the most part. Squeak-repair kits are designed with a probe that finds the joist through carpet, so you can drive the screw without pulling anything up.

    Does talcum powder actually work for squeaky floors? Temporarily, yes. It reduces friction between boards, though it wears off with foot traffic and cleaning, so treat it as a stopgap rather than a real fix.

    How much does it cost to fix squeaky floorboards professionally? In most Indian cities, expect to pay somewhere between ₹500-2,000 per visit for minor repairs, depending on how many spots need attention and whether subfloor access is easy.

    Is a squeaky floor a sign of a serious problem? Usually not — most squeaks are just loose fasteners or natural wood movement. It’s only concerning if it comes with sagging, bouncing, or visible cracks in the ceiling below.

    Can WD-40 fix a squeaky floor? It can help temporarily on metal hardware like hinges near the floor, but it’s not really meant for wood-on-wood friction and can leave stains, so I’d skip it for actual floorboards.

    How long does a squeaky floorboard repair take? Most single-spot fixes take 15-30 minutes once you’ve located the joist. A whole-room job with multiple squeaks might take an afternoon.

    Final Thoughts

    Fixing a squeaky floor really isn’t the intimidating job it sounds like. Most of the time you’re looking at a ₹500 kit and half an hour, not a full renovation. The trickier part is honestly just finding the exact board — once you’ve got that pinned down, the fix itself is fairly mechanical.

    If you’ve been putting this off for months (no judgment, we’ve all done it), pick one weekend, grab a squeak-repair kit from your local hardware store, and knock it out room by room. Your feet — and anyone sleeping down the hall — will thank you.

  • 9 Eco Friendly Flooring Options for a Greener Home in 2026

    9 Eco Friendly Flooring Options for a Greener Home in 2026

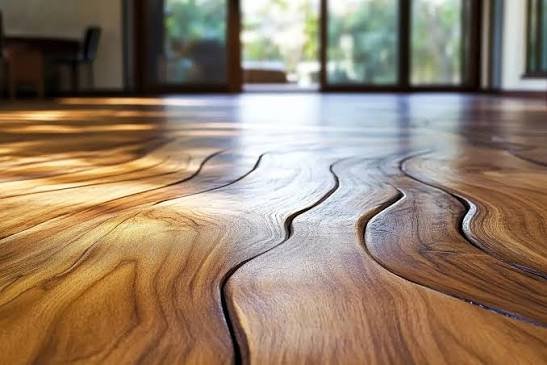
    So you’re redoing your floors and someone just mentioned “off-gassing” and now you can’t stop thinking about it. Fair enough. Most vinyl and laminate flooring is made from petroleum-based materials that release VOCs into your home for months, sometimes years, after installation. If you’re looking for eco friendly flooring options that don’t smell like a chemistry lab and don’t wreck a forest somewhere, you’re in the right place.

    I’ve spent a fair bit of time researching (and arguing with contractors about) sustainable materials, and I’ll be honest — not every “green” option lives up to the label. This guide cuts through the marketing fluff.

    What Makes Flooring Actually Eco-Friendly?

    Eco friendly flooring generally means one of three things: the material is rapidly renewable, it’s reclaimed or recycled, or it’s produced with minimal chemical processing and low emissions. A floor that lasts 40 years also counts as sustainable, even if the raw material isn’t exotic — durability matters more than people give it credit for.

    Bamboo Flooring: Fast-Growing, Surprisingly Tough

    Bamboo isn’t actually wood — it’s a grass, which is why it regrows so quickly. Some species are ready for harvest in just 3-5 years, compared to 20-60 years for hardwood trees.

    I’ll admit I was skeptical the first time I saw bamboo flooring installed in a friend’s apartment in Pune. It looked almost too smooth, too uniform. But three years on, it’s held up fine — no warping, no scratches from the dog. Strand-woven bamboo, in particular, is harder than oak on the Janka hardness scale, which matters if you’ve got kids or pets running around.

    A few things to watch for:

    • Cheap bamboo flooring sometimes uses formaldehyde-based adhesives — always check for a low-VOC or E0 certification
    • Not great in very humid coastal areas without proper sealing
    • Costs roughly ₹150-400 per sq ft in India depending on finish and quality

    Cork Flooring: Soft Underfoot, Naturally Insulating

    Direct answer: Cork flooring is harvested from the bark of cork oak trees without cutting them down, making it one of the few truly renewable flooring materials available. It’s naturally antimicrobial, sound-absorbing, and comfortable to stand on for long periods.

    Picture a small business owner in Jaipur running a home bakery from her kitchen — she’s on her feet eight hours a day. Cork would genuinely help her knees more than tile ever could. That’s not a hypothetical benefit, it’s a physical one; cork compresses slightly under pressure and bounces back.

    The downside? It’s not great with heavy furniture that stays in one spot for years — you’ll get permanent dents. And direct sunlight fades it over time, so pair it with UV-filtering curtains if your room gets a lot of afternoon light.

    Reclaimed and Salvaged Wood

    There’s something about reclaimed wood that new lumber just can’t fake — the character, the slight imperfections, the fact that it’s already survived a century in some old warehouse or railway sleeper. Using it means zero new trees cut, and honestly, the aesthetic is having a real moment right now.

    A few sourcing tips:

    1. Ask for the wood’s origin history — genuine reclaimed wood usually comes with paperwork
    2. Budget extra for cleaning, de-nailing, and re-milling — this isn’t a plug-and-play material
    3. Expect price variation of ₹200-600 per sq ft depending on the wood species and condition

    Is it more work than buying new flooring? Yes. Is it worth it for the look and the story behind every plank? For a lot of homeowners, absolutely.

    Linoleum (Not Vinyl — There’s a Big Difference)

    People confuse linoleum and vinyl constantly, and it drives me a little crazy. Vinyl is plastic. Linoleum is made from linseed oil, cork dust, wood flour, and jute backing — genuinely biodegradable stuff that’s been around since the 1860s.

    Modern linoleum comes in far more colors and patterns than the beige stuff your grandmother might have had. It’s also naturally antibacterial, which is a nice bonus in kitchens.

    Concrete Flooring: Polished, Durable, Underrated

    Direct answer: Polished concrete uses the home’s existing sub-floor, eliminating the need for additional raw materials entirely. It’s extremely durable — often lasting the lifetime of the building — and pairs well with radiant heating systems for energy efficiency.

    I know concrete doesn’t sound glamorous. But polished correctly, with a bit of pigment or aggregate mixed in, it can look genuinely striking. And since you’re not adding a new material layer, it’s about as low-impact as flooring gets.

    Recycled Tile and Glass Composite

    Some manufacturers now make tiles from recycled glass bottles and porcelain waste — waste that would’ve gone straight to a landfill. Performance-wise, these tiles hold up just as well as standard ceramic, sometimes better because of the added silica strength.

    Natural Wool Carpets and Jute Rugs

    If you want warmth without synthetic fibers, wool and jute are biodegradable, renewable, and don’t off-gas like nylon carpets do. Jute in particular is grown widely across West Bengal and Bangladesh, so sourcing locally in South Asia is genuinely easy.

    [link to related guide on choosing sustainable rugs for Indian homes here]

    Cost Comparison: What Actually Fits Your Budget?

    MaterialApprox. Cost (₹/sq ft)Lifespan
    Bamboo150-40025-50 years
    Cork250-50025-40 years
    Linoleum150-35025-40 years
    Reclaimed wood200-60050-100 years
    Polished concrete100-30050+ years

    [link to full home renovation budget guide here]

    Maintenance Tips for Sustainable Floors

    Most eco flooring needs less maintenance than people assume, not more. A weekly sweep and an occasional damp mop cover it for cork, bamboo, and linoleum. Avoid harsh ammonia-based cleaners — they strip natural finishes faster than you’d think.

    [link to eco-friendly home cleaning products guide here]

    FAQ: Eco Friendly Flooring Options

    Is bamboo flooring actually more sustainable than hardwood? Generally yes, mainly because of how fast it regrows. Just make sure the adhesive and finish are low-VOC, since that’s where a lot of “green” bamboo products quietly cut corners.

    Which eco friendly flooring option is cheapest in India? Polished concrete and linoleum tend to come in on the lower end, often under ₹300 per sq ft installed, depending on your city and contractor.

    Does eco-friendly flooring last as long as regular flooring? Often longer, actually. Reclaimed wood and polished concrete can outlast standard laminate by decades if maintained properly.

    Can I install eco-friendly flooring over existing tiles? Cork and some engineered bamboo products can go over existing subfloors if they’re level. Concrete obviously can’t — that requires exposing the base layer.

    Is cork flooring waterproof? Not fully waterproof, but with a proper sealant it handles moisture reasonably well. I wouldn’t put it in a bathroom with poor ventilation, though.

    Do eco-friendly floors need special cleaning products? Not really — mild, pH-neutral cleaners work fine. Skip anything with ammonia or bleach, since those break down natural finishes over time.

    Final Thoughts

    Choosing among eco friendly flooring options isn’t really about picking the “greenest” label on a box — it’s about matching the material to how you actually live. A busy kitchen probably wants cork or linoleum; a statement living room might call for reclaimed wood. Either way, you’re cutting down on chemical exposure and landfill waste, which is a win regardless of the room.

    If you’re planning a renovation this year, get samples of two or three materials before committing — most suppliers will send small swatches for free. Walk on them, see how they feel, and decide from there.

  • How Long Does a Roof Last? Lifespan by Material Type

    How Long Does a Roof Last? Lifespan by Material Type

    Ever stood in your yard, squinted up at your roof, and wondered if it’s got another decade in it — or if you’re one bad monsoon away from a leak? You’re not alone. How long does a roof last is one of those questions homeowners don’t think about until water starts dripping onto the dining table.

    The honest answer: it depends entirely on what your roof is made of, how it was installed, and how much abuse your local weather throws at it. A cheap asphalt shingle roof in a hailstorm-prone area might tap out at 12 years. A well-installed metal roof could easily outlive the mortgage. Let’s break it down material by material, because “it depends” isn’t much use without the specifics.

    Average Roof Lifespan by Material

    Quick answer: Most roofs last somewhere between 15 and 50 years depending on material — asphalt shingles average 15-20 years, metal roofs 40-70 years, and concrete or clay tiles can exceed 50 years with proper maintenance.

    Here’s a rough breakdown I’ve put together after years of talking to contractors and homeowners about this exact question:

    • Asphalt shingles — 15 to 20 years, sometimes less in hot, sunny climates
    • Metal roofing — 40 to 70 years, varies a lot by gauge and coating
    • Clay or concrete tile — 50+ years, some Mediterranean-style homes have originals from the 1960s still up there
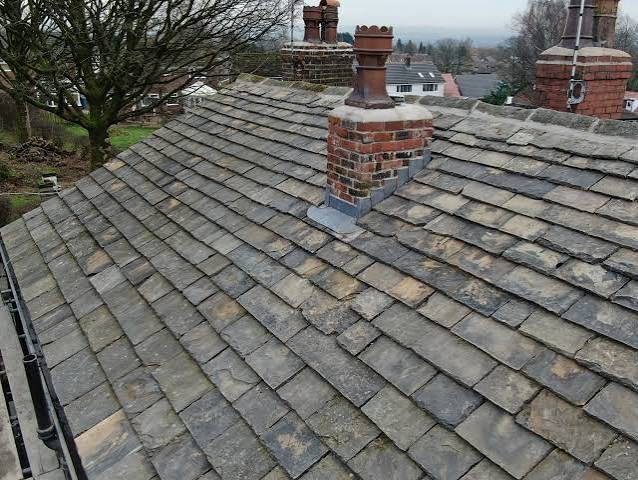
    • Slate — 75 to 100+ years (yes, really)
    • Wood shakes — 20 to 40 years, but only if maintained religiously
    • Flat/built-up roofing (common on Indian apartment buildings) — 10 to 20 years depending on waterproofing quality

    That range is huge, I know. That’s kind of the point — the material you choose sets the ceiling on how long your roof can realistically last.

    Asphalt Shingles: The Budget-Friendly Middle Ground

    Asphalt shingles are everywhere in Western construction, and increasingly showing up in Indian villa and bungalow projects too. They’re affordable, easy to install, and forgiving if a contractor makes a small mistake.

    The catch? They don’t love heat. I’ve noticed that shingle roofs in places with intense, prolonged summer sun — think Jaipur or Ahmedabad — tend to age faster than the manufacturer’s warranty suggests. The sun literally bakes the oils out of the asphalt over time, making shingles brittle and prone to cracking.

    A standard 3-tab shingle roof gets you around 15-20 years. Architectural (dimensional) shingles, which are thicker, can push past 25 years. If you’re in a hail-prone region, budget for the shorter end of that range — hail damage is the number one reason asphalt roofs get replaced early.

    Metal Roofing: Built for the Long Haul

    How long does a roof last when it’s metal? Considerably longer than most other options. Steel, aluminum, and copper roofing systems routinely hit 40-70 years, and copper in particular can last well over a century if it’s not physically damaged.

    Metal roofs handle heavy rain brilliantly, which makes them a smart pick for coastal or high-monsoon regions. They also reflect heat rather than absorbing it, so your top floor stays noticeably cooler — a real bonus in Indian summers.

    The main downside is upfront cost. You’re paying two to three times what you’d pay for asphalt. But when you divide that cost over 50-plus years instead of 18, the math often works out in metal’s favor. Picture a small business owner in Jaipur running a warehouse — the energy savings from a reflective metal roof alone can justify the investment within a decade.

    Clay and Concrete Tiles: Old-School and Practically Bulletproof

    Tile roofs are a common sight across South India and in older colonial-era buildings. And for good reason — clay and concrete tiles routinely outlast the people who installed them.

    A well-laid tile roof can go 50 years without a full replacement, sometimes longer. The tiles themselves are essentially fired clay or cement, so they don’t rot, rust, or get eaten by insects. What actually fails first is usually the underlayment beneath the tiles, not the tiles themselves.

    That’s an important distinction. If your tile roof starts leaking at year 30, it doesn’t necessarily mean the whole roof needs replacing — often it just needs the waterproofing membrane redone underneath. [link to related guide on roof waterproofing here]

    Slate Roofing: The Century Club

    Slate is the outlier on this list. Properly installed slate roofs have been known to last 100 years or more, and it’s genuinely common to see 75-year-old slate roofs still doing their job in Europe and parts of the northeastern US.

    It’s heavy, though — really heavy — which means your roof structure needs to be engineered to support it from day one. Retrofitting slate onto an existing home built for lighter materials is usually a bad idea, and most contractors will tell you the same.

    Cost-wise, slate sits at the premium end. Most homeowners choosing slate today are doing it for heritage restoration projects rather than new builds, simply because so few structures are designed to carry the weight.

    Flat and Built-Up Roofs: Common in Urban India

    If you live in an apartment or a commercial building in an Indian city, there’s a good chance you’ve got a flat roof with some form of waterproofing membrane — bitumen, APP membrane, or increasingly, spray-applied polyurethane coatings.

    These typically last 10-20 years, and honestly, that’s the shortest lifespan on this list. Flat roofs pool water more than sloped ones do, and standing water is enemy number one for any waterproofing layer.

    I’ll be a little opinionated here: I think flat roof maintenance gets neglected far more than it should in Indian residential buildings. A simple annual inspection before monsoon season — checking for cracks, blisters, and pooling — can add years to a flat roof’s life for almost no cost. Skip that, and you’re looking at leaks by year 8 or 9 in a lot of cases.

    What Actually Shortens a Roof’s Lifespan

    Quick answer: Poor installation, inadequate ventilation, extreme weather exposure, and skipped maintenance are the biggest factors that cut a roof’s lifespan short — often by a decade or more compared to the manufacturer’s stated life expectancy.

    A few specific culprits worth flagging:

    1. Poor attic or under-roof ventilation, which traps heat and moisture
    2. Walking on the roof more than necessary during installation or repairs
    3. Ignoring small leaks until they become structural problems
    4. Using a lower-grade underlayment to save cost upfront
    5. Skipping gutter cleaning, which leads to water backing up under roofing materials

    Has any of this sounded familiar from your own roof’s history? It usually takes just one of these to knock years off an otherwise solid roofing system.

    Signs Your Roof Is Nearing the End

    You don’t need to wait for an obvious leak to know a roof is failing. Some earlier warning signs include curling or missing shingles, granules collecting in your gutters, sagging spots on the roofline, and daylight visible through the attic boards.

    For tile and metal roofs, watch for cracked or slipped tiles, and rust streaks or spots on metal panels. None of these mean instant collapse, but they’re your roof telling you it’s time to call someone out for a proper inspection rather than waiting another year.

    How to Extend Your Roof’s Lifespan

    Regular maintenance genuinely changes the math here. A roof that’s inspected annually and repaired promptly can often outlast its rated lifespan by 20-30%, while a neglected one frequently falls short.

    A few habits worth building in:

    • Clean gutters twice a year, more often if you’ve got overhanging trees
    • Trim back branches that scrape or drop debris onto the roof
    • Get a professional inspection before monsoon season, not after
    • Fix small leaks immediately rather than “keeping an eye on it”
    • Add or improve attic ventilation if your home runs hot in summer

    [link to related guide on choosing the right roofing contractor here] can help if you’re not sure who to call for that inspection.

    FAQ: Common Questions About Roof Lifespan

    How long does a roof last on average in India? Most residential roofs in India — tile, asphalt, or flat concrete with waterproofing — last somewhere between 15 and 40 years, with tile generally on the higher end and untreated flat roofs on the lower end.

    Does roof color affect how long a roof lasts? Yes, to a degree. Lighter colors reflect more heat and can reduce thermal stress on the material, which may add a few years, especially in hot climates.

    Can I re-roof over an existing roof to save money? Sometimes, with asphalt shingles, but it’s rarely a good long-term move. It traps heat, hides underlying damage, and usually isn’t allowed for more than one layer by local building codes.

    Is a 20-year roof warranty the same as a 20-year lifespan? Not exactly. Warranties often cover manufacturing defects, not weather damage or installation errors, so real-world lifespan can differ from the warranty period in either direction.

    How often should I get my roof inspected? Once a year is a reasonable minimum, ideally before monsoon season, plus a check after any major storm or hailfall.

    Does roof pitch affect lifespan? Yes — steeper roofs shed water and debris faster, which generally means less standing water damage and a longer life compared to low-slope or flat designs.

    Final Thoughts

    So, how long does a roof last? Somewhere between 15 and 100 years, depending entirely on what it’s made of and how well it’s cared for. Asphalt gives you an affordable middle ground, metal and tile go the distance, and slate is basically generational.

    The real takeaway, though, is that material only sets the potential — maintenance decides whether you actually get there. If your roof is past the 15-year mark and you haven’t had it looked at recently, that’s probably worth fixing before your next monsoon season rolls around, not after the ceiling starts staining.